
 Useful tips
Watch the video, If you're too lazy to read
Watch the video, If you're too lazy to read
Content:
DIY Sweet Gift
Coffee Cup
Coffee Heart Coffee Bean
Hedgehog Colorful T-shirt Scarf Canvas
Silhouette Thread
Heart
Woven Hearts
Wedding anniversary gift
Memorable album
Gift for a guy
Bright gift decoration Lily
packaging
Best DIY gifts

It is always a pleasure not only to receive gifts, but also to give them. And if you give a gift made by yourself, it's doubly pleasant.
There are a lot of gifts that you can make with your own hands, and many of them are not so complicated, despite the fact that they look very beautiful.
Find out what gifts you can make yourself.
DIY sweet birthday gift
Both a child and an adult will be happy with such a gift. It is not difficult to make it, but the birthday boy's delight is assured.
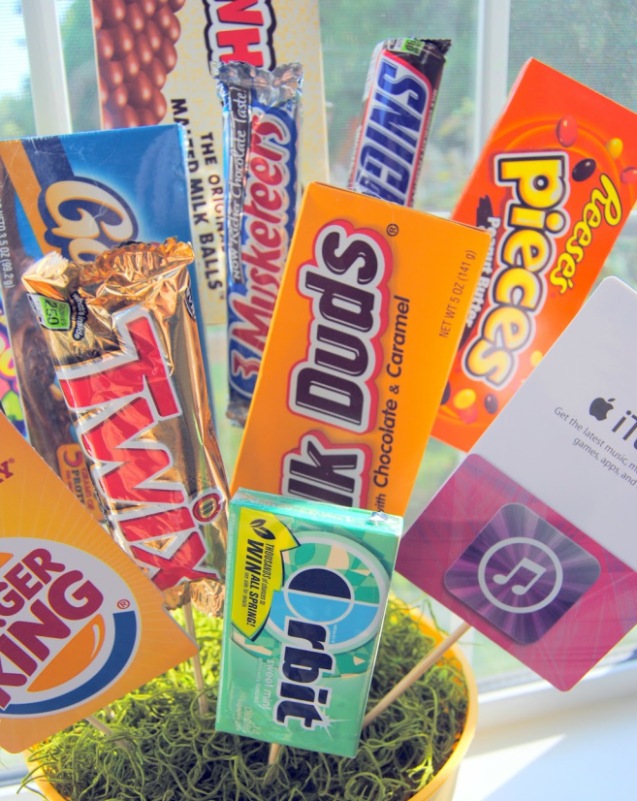
© Making a McHome: Pot of Good and Plenty/pinterest
You'll need:
– sweets
– gift cards
– superglue
– pot
– floral foam (can be replaced with polystyrene foam or polyester)
– artificial moss or grass
– skewers
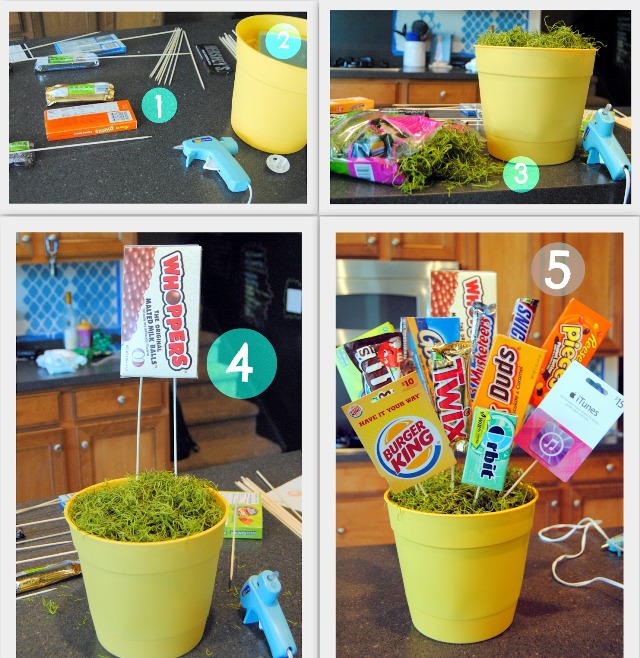
© Making a McHome: Pot of Good and Plenty/pinterest
1. Glue the skewers to sweets and gift cards.
2. Place foam, styrofoam or polyester in a pot.
3. Cover the foam with artificial moss or grass
4. Start inserting skewers with sweets into the foam (place the largest gift on the back and then distribute the gifts by size throughout the pot)
How to make a gift with your own hands. A coffee cup.
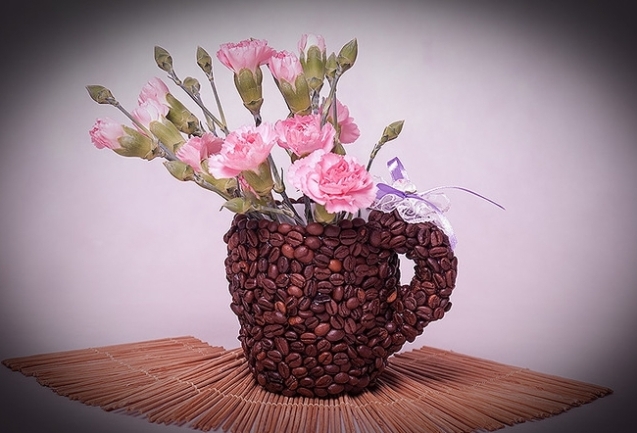
© DIY Enthusiasts
Any coffee fan will love such a gift. If you are not yet familiar with the technique of decorating coffee beans, you can read about how to make a coffee tree and a coffee baobab.
You'll need:
– coffee mug
– coffee beans
– cotton pads
– white thread
– brown acrylic paint
– glue (hot or super glue)
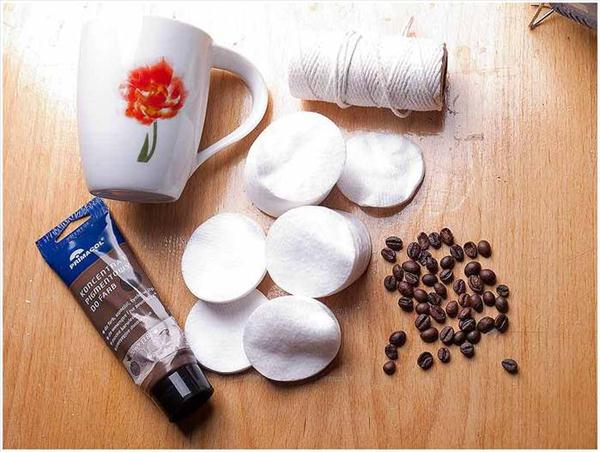
© DIY Enthusiasts
1. Glue cotton pads to the mug. You should cover the entire surface of the mug with cotton pads.
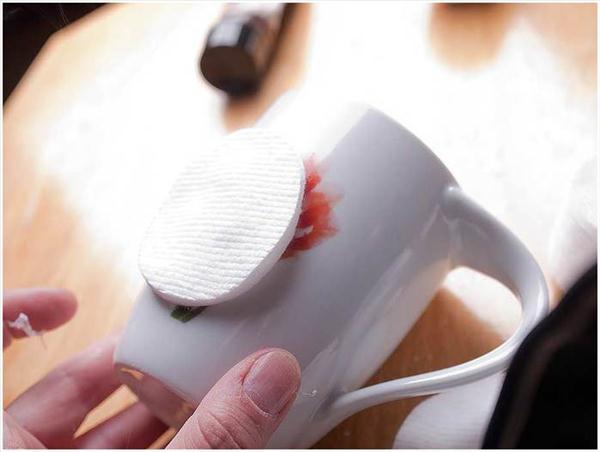
© DIY Enthusiasts
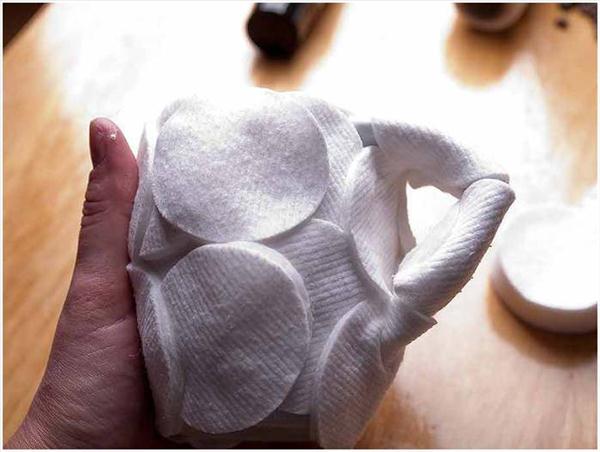
© DIY Enthusiasts
2. Wrap the mug with a thread.
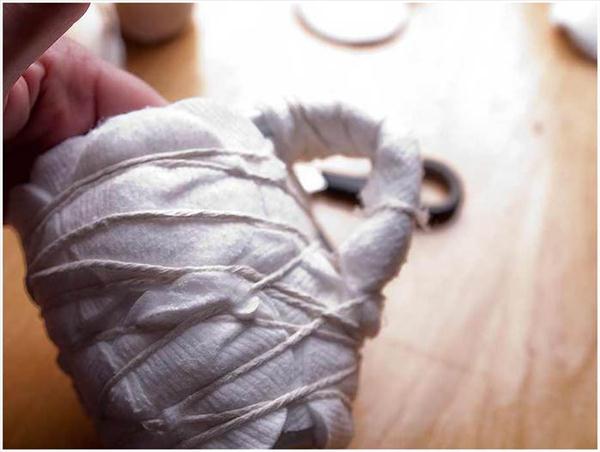
© DIY Enthusiasts
3. Apply brown acrylic paint (over cotton pads and thread).
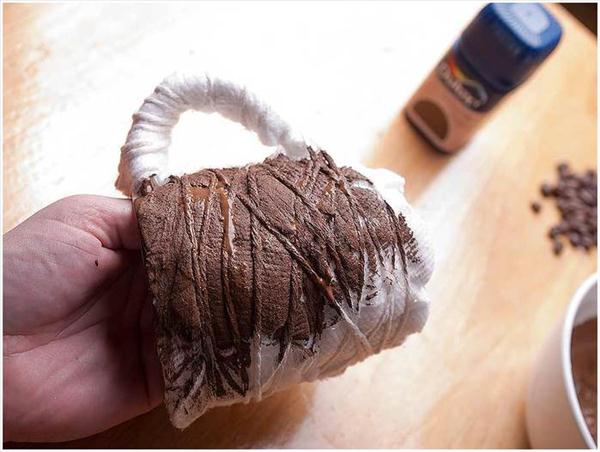
© DIY Enthusiasts
4. Now start gluing the coffee beans. To avoid empty spaces, glue the cup with two layers of grains.
© DIY Enthusiasts
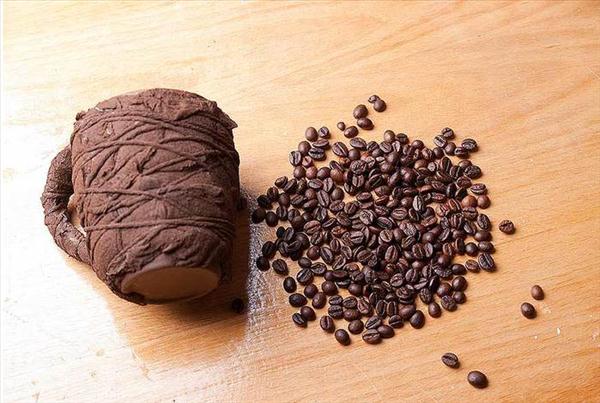
© DIY Enthusiasts

© DIY Enthusiasts
5. Decorate your cup with ribbon or lace.
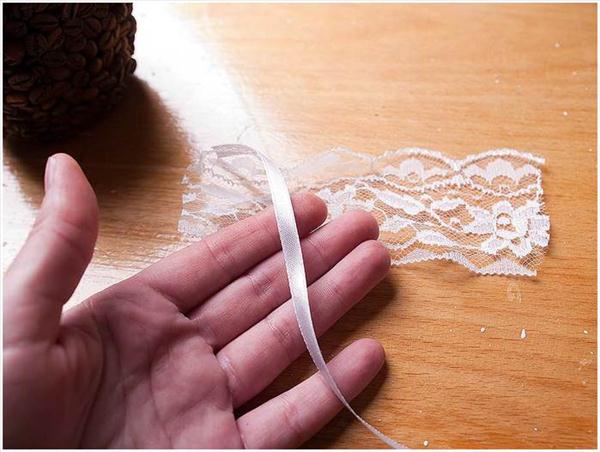
© DIY Enthusiasts
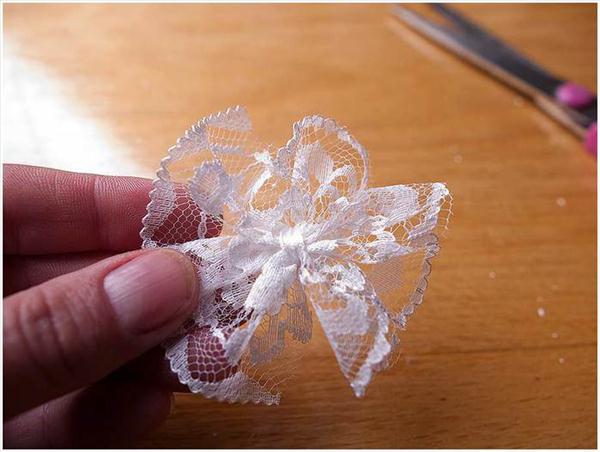
© DIY Enthusiasts
Read also How to make a vase with your own hands
Original gifts with your own hands. Coffee heart.
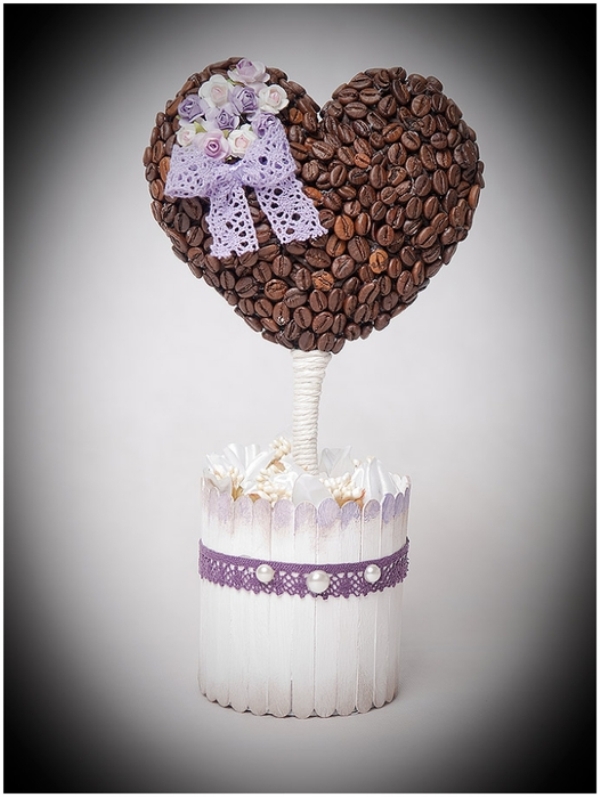
© DIY Enthusiasts
You'll need:
– paper
– wire
– coffee beans
– cardboard
– glue
– thread
– iron can
– jute thread
– sponge
– decorative flowers and ribbons
– brown paint
1. Prepare a sheet of paper, fold it in half and draw half a heart on one side. Cut a paper heart along the outline.
See also: DIY air conditioner
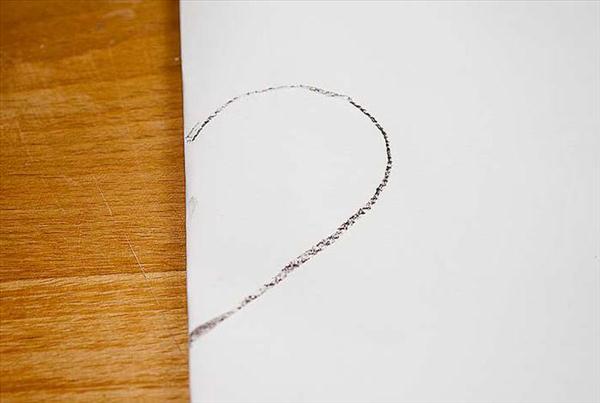
© DIY Enthusiasts
2. Place a paper heart on the cardboard and circle it, then cut the heart out of cardboard. Repeat for the second cardboard heart.
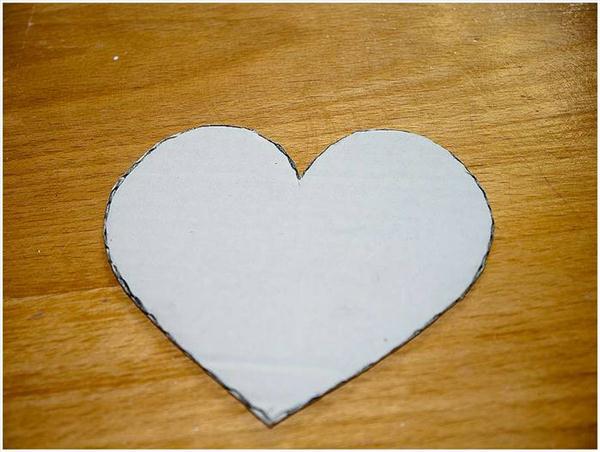
© DIY Enthusiasts
3. Prepare 2 wires and wrap them with paper.
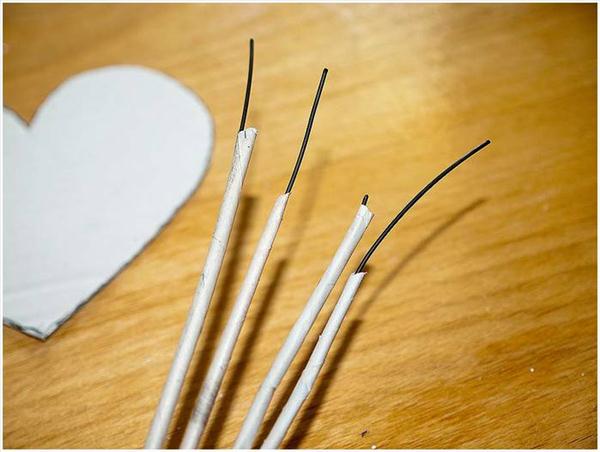
© DIY Enthusiasts
4. Glue the wire to the heart.
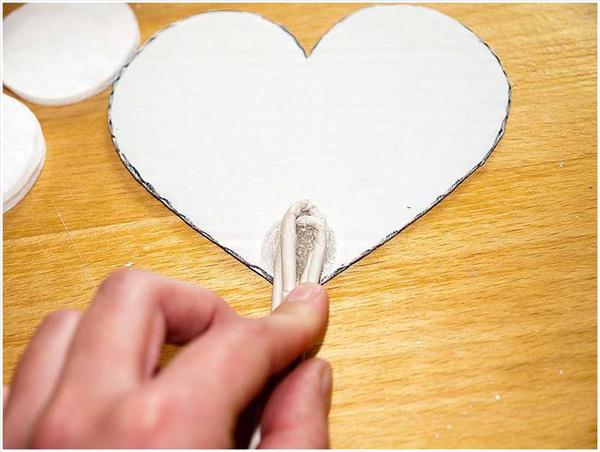
© DIY Enthusiasts
5. Prepare cotton pads and glue them in several layers between two cardboard hearts to create volume.
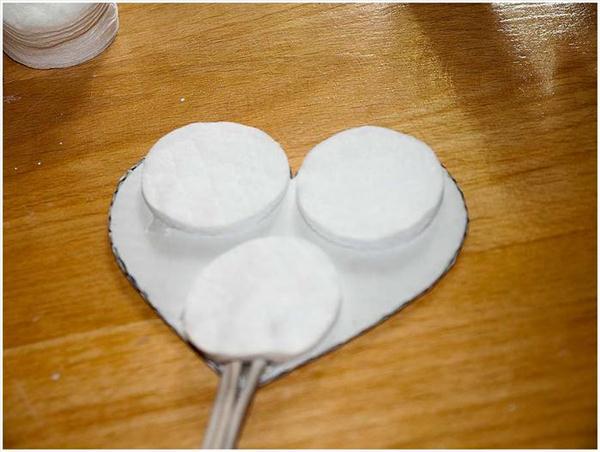
© DIY Enthusiasts
6. After you have a voluminous heart, wrap it with cotton pads and wrap it with a thread.
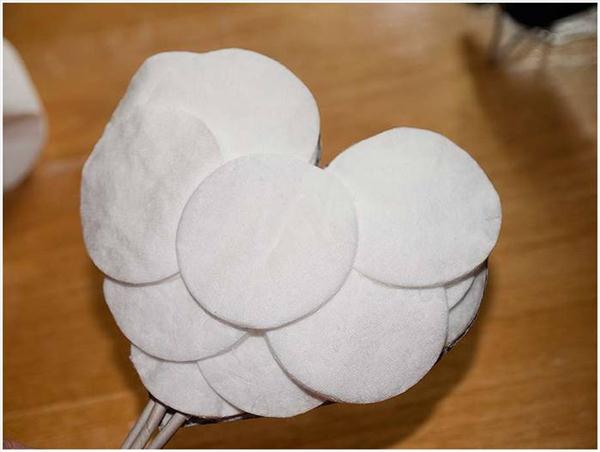
© DIY Enthusiasts
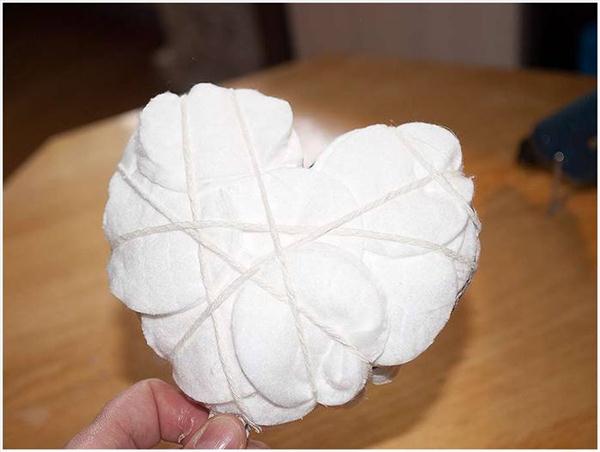
© DIY Enthusiasts
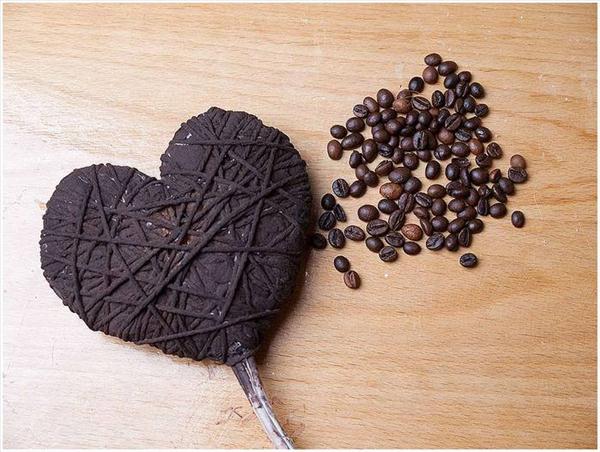
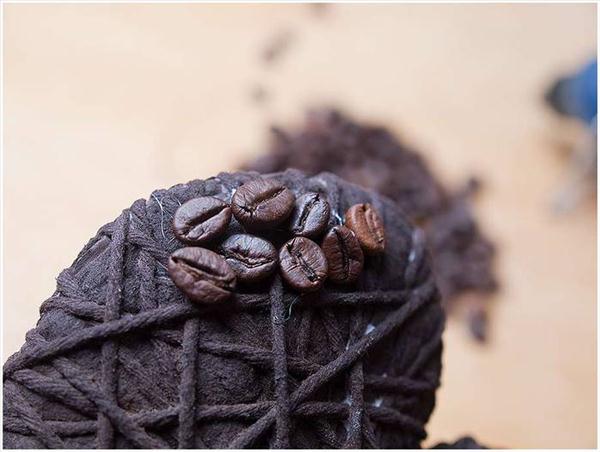
7. Paint the heart with brown paint and glue the coffee beans.
© DIY Enthusiasts
© DIY Enthusiasts
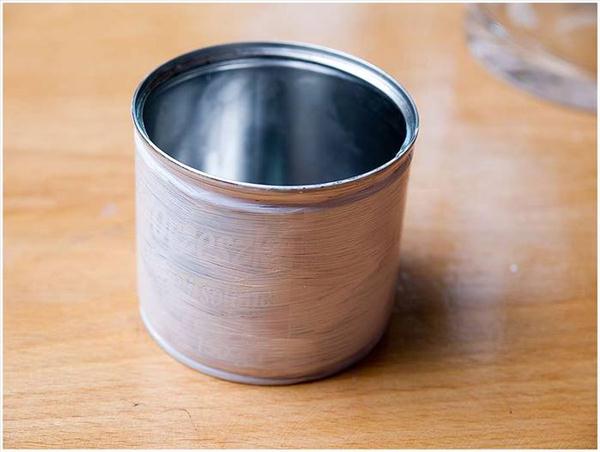
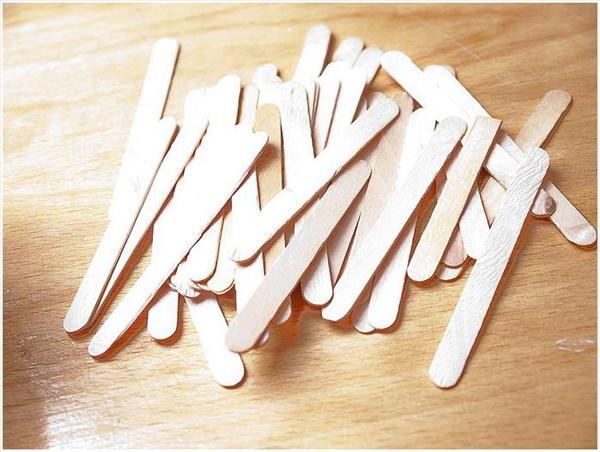
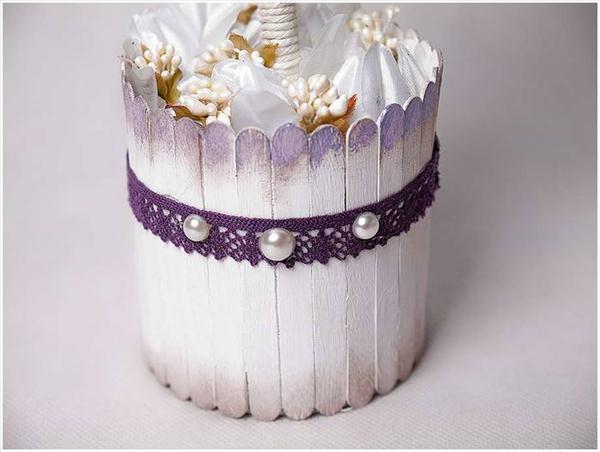
8. Prepare an iron jar and glue ice cream sticks to it in a circle.
© DIY Enthusiasts
© DIY Enthusiasts
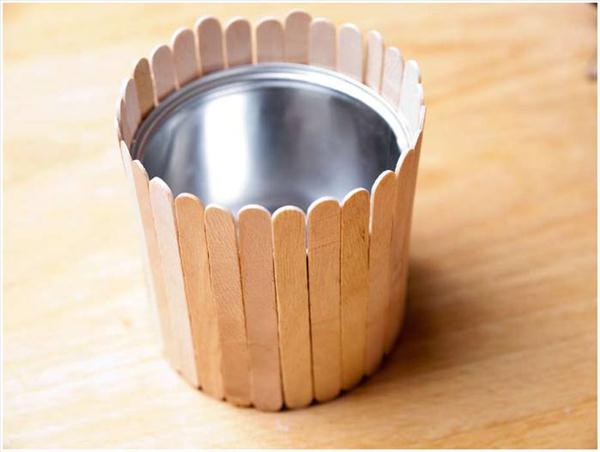
© DIY Enthusiasts
9. Wrap the wires that are glued to the heart with jute thread.
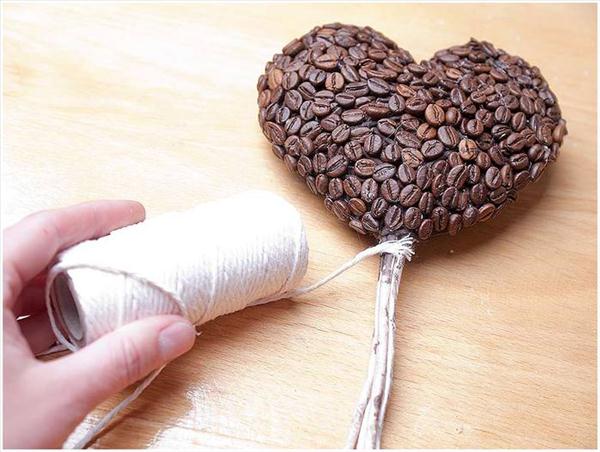
© DIY Enthusiasts
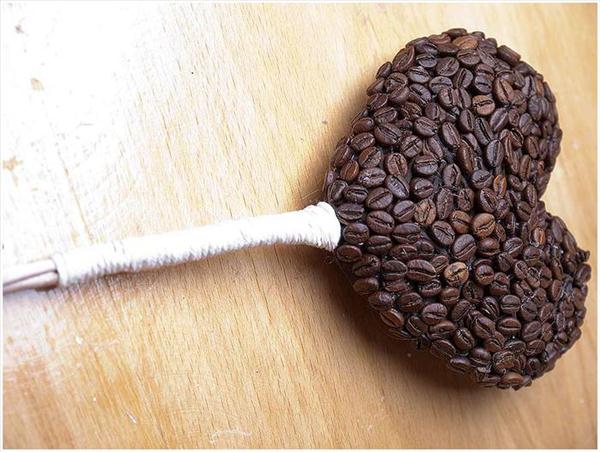
© DIY Enthusiasts
10. Insert the sponge into the pot and insert the coffee heart into it.
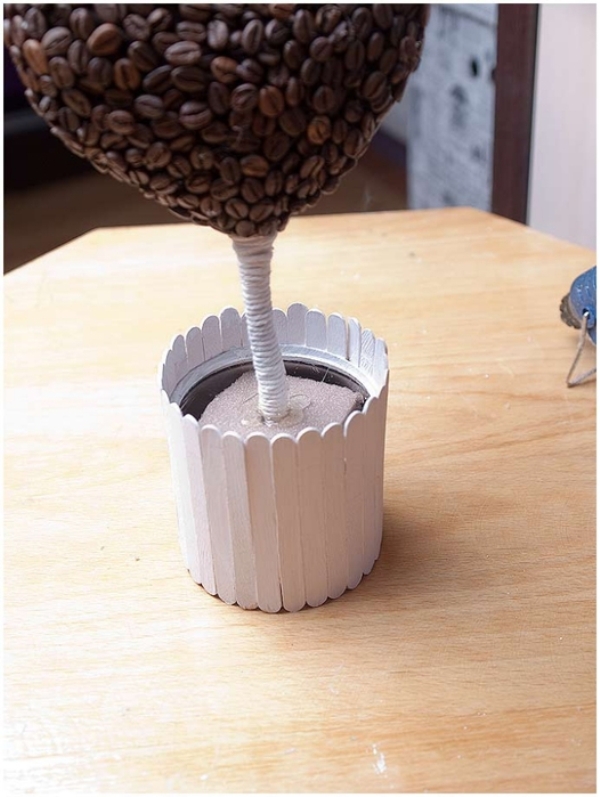
© DIY Enthusiasts
If you wish, you can decorate the craft with ribbons, decorative flowers and/or other details.

© DIY Enthusiasts
© DIY Enthusiasts
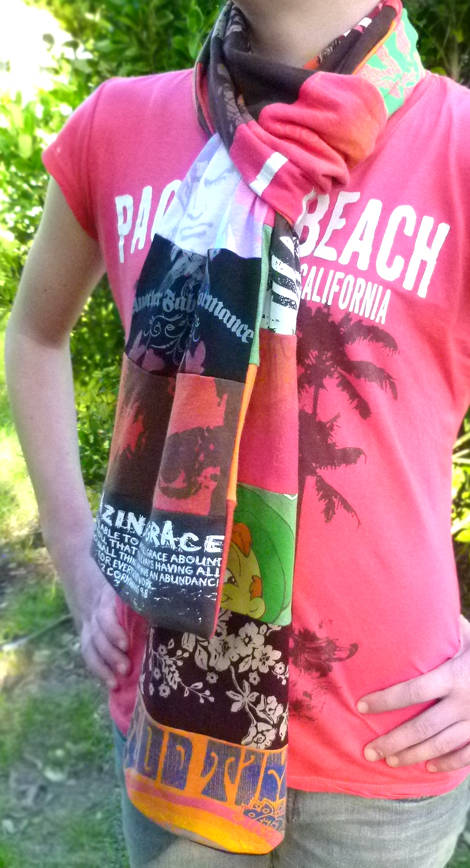
A gift to a friend with your own hands. A colorful scarf made of T-shirts.
© Just Something I made
T-shirts for this scarf can be used like old ones or ones you don't wear, or buy inexpensive ones in the children's or teenage clothing department.
You'll need:
– thread
– needle
– jerseys
– scissors
Before cutting, it is advisable to wash the shirts.
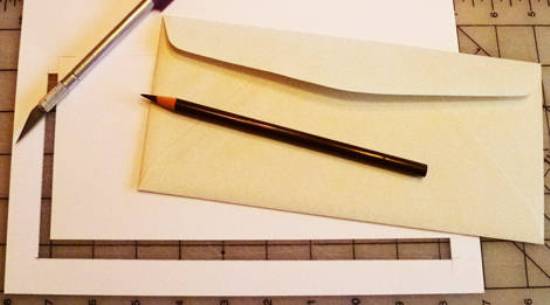
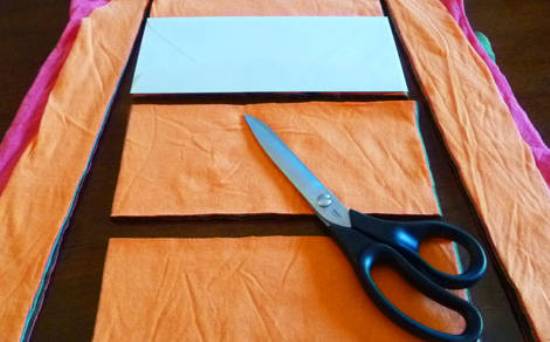
To make a stencil, prepare a business envelope and thick paper or cardboard. Circle the envelope and cut the stencil out of cardboard (see picture).
© Just Something I made
The front part of the scarf consists of drawings and patterns, and the back part consists of plain sections.
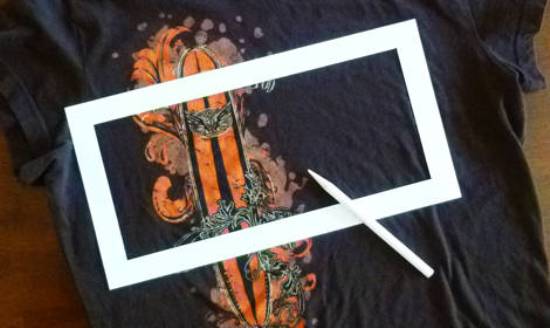
1. Place the stencil on the material and, using a white pencil, circle the dark areas on the fabric and the brown or black places on the bright spots.
© Just Something I made
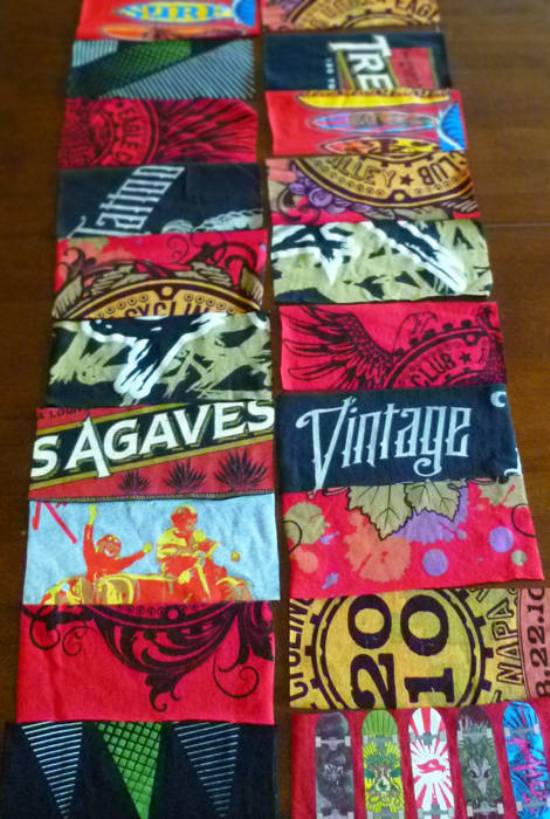
* It took about 20 sections to transfer.
© Just Something I made
2. When you have cut out all the sections you need, fold them the way you like, and then just sew one to the other.
3. After you have sewed all the sections, iron your workpiece.
4. Now you need to make the back side of the scarf. To do this, you also need to cut several sections but already plain and sew them together. Sections can be made longer.
© Just Something I made
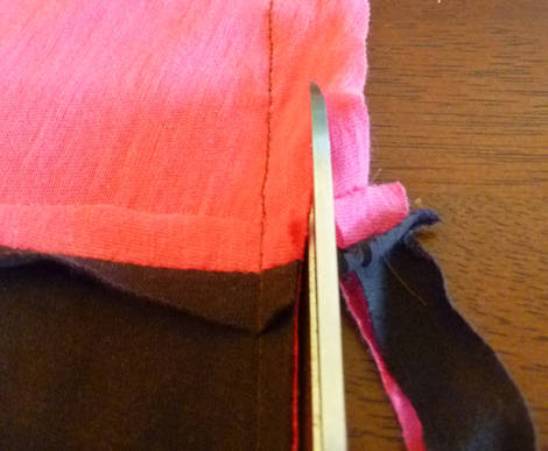
5. Sew the front and back of the scarf. If necessary, cut off the excess on the scarf.
© Just Something I made
6. Iron the scarf – it is better to do this through cheesecloth.
Read also How to make a gift to mom, grandmother and sister with your own hands
DIY birthday gift. Silhouette on canvas.
© Tatertots and Jello
You'll need:
– canvas
– old magazines
– scissors
– glue (preferably decoupage glue – in this example it's Mod Podge)
– acrylic paint
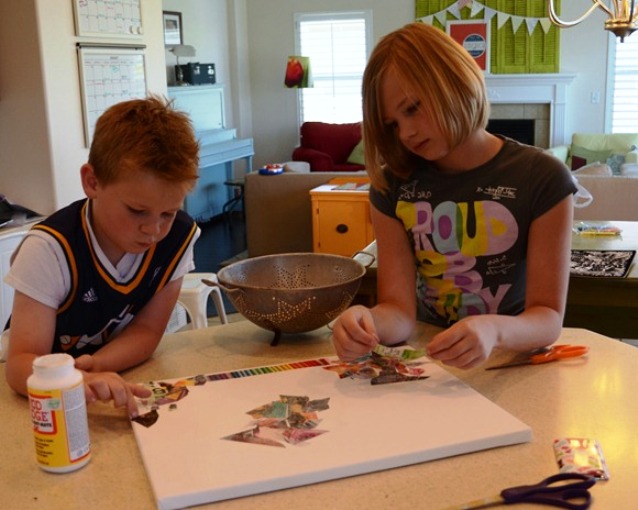
1. To begin with, cut old magazines into small pieces (you can attract children – they will love it). Of course, the more colorful the magazine page, the better.
© Tatertots and Jello
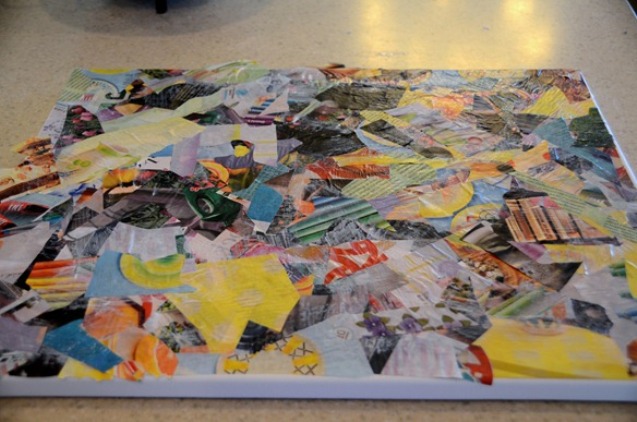
2. When you have a bunch of cut magazine pages, you need to glue them to the canvas. To do this, anoint the canvas with glue, and start gluing pieces of magazine pages. It is advisable to cover the entire canvas.
© Tatertots and Jello
* Don't worry if something isn't very evenly glued, bumps are even welcome.
3. When everything is glued on, leave the canvas to dry.
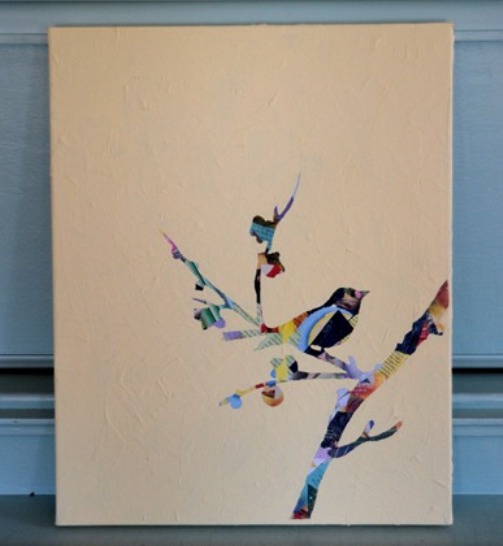
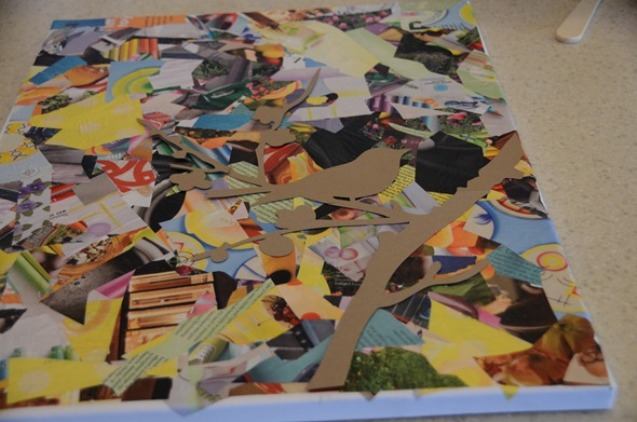
4. Prepare the desired silhouette (in this example, it's a bird on a tree). To make a silhouette, simply draw it on cardboard or thick paper and cut it out.
5. Place the silhouette on canvas and trace it with a pencil or marker.
© Tatertots and Jello
6. Now cover everything except the silhouette with acrylic paint.
It's done!
DIY wedding gift. A heart made of threads.
You'll need:
– wooden tablet or board
– thread of any color
– nails
– paper on which you will draw a heart
Optional: spray paint to paint the board
1. If you decide to paint your wooden tablet, then this should be done first. If you use a bright thread (red, orange, yellow), it is better to paint the board in dark colors.
2. Prepare a large sheet of paper or newspaper, place it on a tablet and draw a straight heart on it.
3. Nail nails along the contour of the heart and remove the paper. The distance between the nails is about 2.5 cm.
4. Prepare the thread and tie its end to one of the nails. Start weaving the thread from one nail to another. There are no rules, you can weave as you like until all the space between the nails is covered and you have a heart.
Cool gifts with your own hands. Woven hearts.
You'll need:
– scissors
– felt (or thick paper or fabric)
Optional: tape.
1. Start with two ovals, as shown in the picture. You can make them from felt or thick colored paper.
2. Fold the oval in half and make 3 parallel cuts from the fold to the rounded end, not reaching about 2-3 cm.
3. Start intertwining the ovals as shown in the picture – by threading one strip into another and moving them up. You should get a chessboard coloring.
4. You can add a heart pen so you can hang it in the house.
To better understand how to weave ovals, watch the video:
DIY wedding anniversary gift
You'll need:
– CD bag
– wrapping paper (colored paper is possible)
– vellum paper
– various decorations (buttons, letters, clips)
– photos (black and white or color)
Optional (but very useful): circle cutter (Fiskars cutter used in this example)
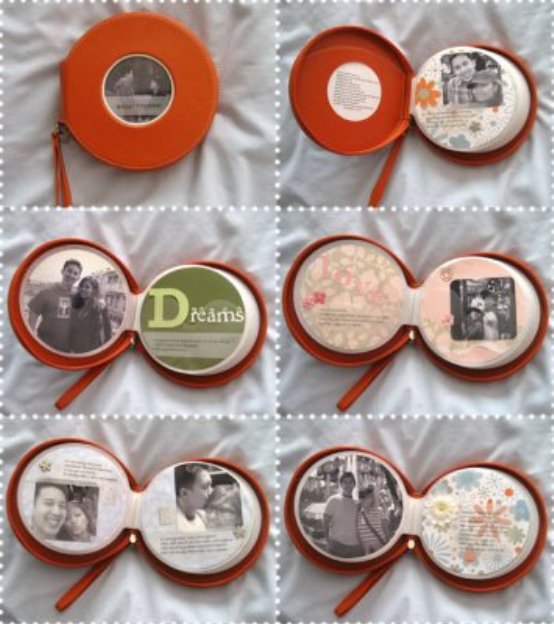
1. This cover has 24 pages. Cut 22 CD-sized mugs out of wrapping paper, as well as 2 mugs of the same size from large photos.
2. You can print a few words or short phrases on vellum paper, which you can then cut and paste into the album.
3. In this example, each page of the album is decorated not only with photos, but also with phrases from favorite songs, quotes, and thoughts.
4. For internal pages, you can use small photos to which you can attribute your desired phrases or poems.
Wedding anniversary gift with your own hands. Memorable Instagram-style album.
The main detail of this album is photographs of the first year since the wedding. This example uses Instagram photos, but you can use regular ones. To print photos from Instagram, you can use PostalPix.
You'll need:
– photos
– thick paper or map
– pen or marker
– decorations (stickers, sparkles)
– glue
– washi tape, thick tape or thick paper (for the spine)
1. Cut sheets from colored cardboard that are slightly larger than the size of the photos. You can use small stickers and colorful pens to decorate each photo page and add a few nice words.
* You can use parts of the map together with colored cardboard, it will go well with photos.
2. Using PVA glue, connect all pages. To do this, place the pages in a thick book, leaving a space outside where you will glue and glue the spine.
3. After you have applied glue to the tips of the pages, glue the root from the washi tape. If there is no such tape, you can use thick tape, or thick paper and glue.
DIY gift for a guy or girl
You'll need:
– small envelopes of different colors (bought or made by hand)
– a thick sheet of paper (A4 cardboard)
– A4 sheet
– glue
– details (hearts, stickers and other nice little things)
It's very simple:
1. Gently glue the envelopes to a sheet of thick cardboard.
2. Prepare a regular sheet of paper (you can have several sheets of different colors) and cut out small cards on which you can write wishes, poems, quotes, etc.
* It is not necessary to make exactly as many cards as envelopes, as in some envelopes you can place surprises in the form of confetti, hearts, etc.
You can place the finished craft in a file or a special paper bag, and wrap it with ribbon as a gift.
Original gifts with your own hands. Bright gift decoration.
© Crème de la Craft
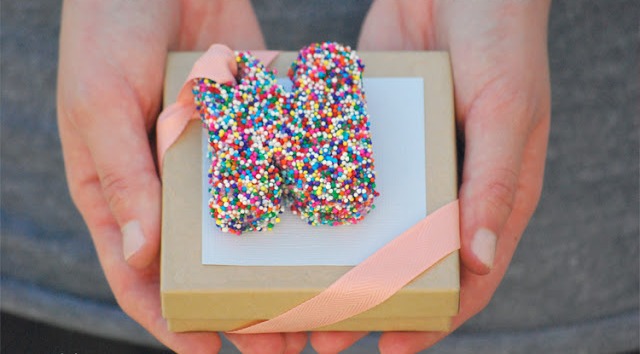
If you bought a gift and made it yourself, then beautiful packaging will be very useful. The first impression is always important, which means that beautiful packaging is half the battle.
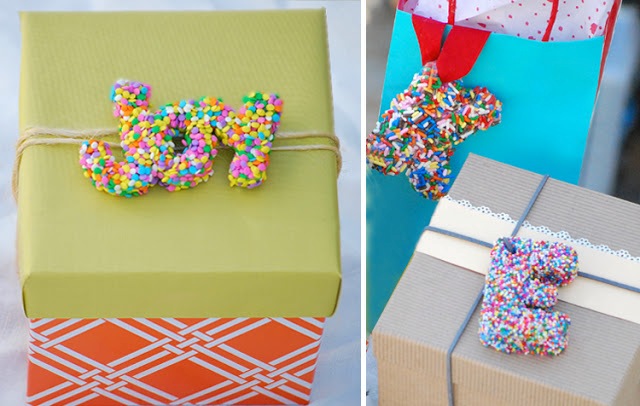
This bright package is suitable for a birthday or New Year. All you need is to cut any shape or letter out of the sponge and cover it with decorative sprinkles, which are usually used to cover confectionery products.
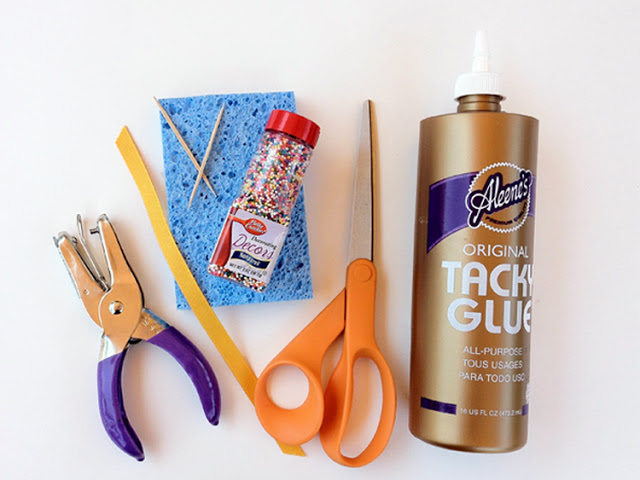
You'll need:
– sponge
– decorative topping
– tape
– scissors
– hole punch
– superglue
– 2 toothpicks
© Crème de la Craft
1. Cut the desired shape, letter or word out of the sponge.
2. Use a hole punch to make a hole in the corner.
3. Cover the upper part of the sponge with glue. You can spread the glue over the surface of the workpiece with the remaining parts of the sponge. If you don't want to get your hands dirty with glue, you can stick a toothpick into a sponge and hold it to apply glue.
4. Now cover the sponges with decorative sprinkles and let them dry – this may take 24 hours.
* Do not touch the sponge until everything is dry.
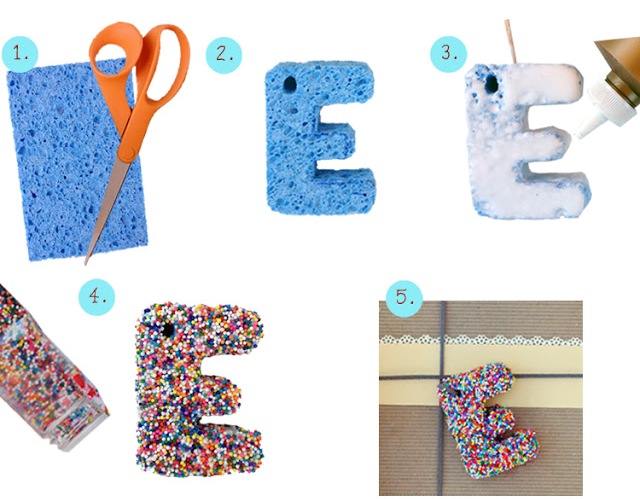
5. When the glue has hardened, turn the workpiece over and repeat the instructions in steps 3 and 4 on the back side.

6. Through the hole made with a hole punch, thread the ribbon and attach it to the gift.
Unusual gifts with your own hands. Lily packaging.
Any gift for mom, grandmother, sister or girlfriend can be placed in such a colorful package that will serve as an elegant addition to your gift.
You'll need:
– colored paper
– adhesive tape (scotch)
– stapler
– hole punch
– yellow corrugated paper
– scissors
1. Cut a square out of a sheet of colored paper that is about the same size as in the upper picture (green square). The size of the flower will depend on the size of the paper.
In this example, we used squares whose side sizes varied from 7 to 12 cm.
2. Cut a 12 cm long piece out of corrugated paper, and fold it into a third of the width and half the length.
3. Cut an oval resembling a leaf out of a paper square and wrap this sheet with a rectangle of corrugated paper. Secure the base with a stapler.
4. Make several similar flowers of different sizes and connect them all together with a stapler.
5. When you have 3-5 flowers in the bouquet, you will need to hide the place where they are held together. To do this, simply cover them with a green paper leaf and secure them with tape.
6. Use a hole punch to make a hole through the leaf and flower bases to thread the rope or ribbon.
7. Wrap your gift and tie a paper bouquet of flowers to it.
You can make as many lilies as you like.
Read also A gift for dad, grandfather, brother and/or loved one with your own hands
Best DIY gifts Coffee
Bean Hedgehog