 Useful tips
The most beautiful spring holiday is just around the corner, and we want to prepare something special for our beloved women. Why not make a gift for March 8 with your own hands? We offer you ideas for creating original jewelry that will delight your loved ones.
DIY bracelets
DIY rings
DIY necklaces
DIY hairpins
DIY earrings
DIY bracelets
An elegant bracelet is a beautiful piece of jewelry that is loved by women all over the world. It turns out that making an original bracelet with your own hands is not so difficult. Materials for these fun things can be purchased at specialty stores, including online stores that offer DIY accessories.
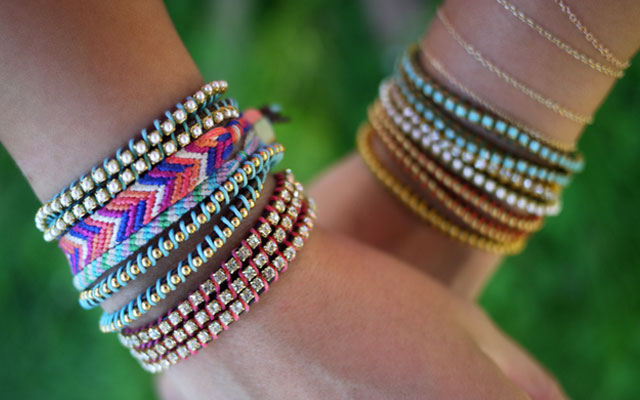
What you might need for a double bracelet:
— Leather lace with a thickness of 1.5 millimeters and a length of 1-1.5 meters
— Yellow copper ball chain or rhinestone tape 30-40 centimeters long (approximately to wrap your wrist twice)
— Waxed lace or any thick thread 1.5-1.8 meters long
— Yellow copper hexagonal nut with a diameter of 0.6 centimeters
— Scissors
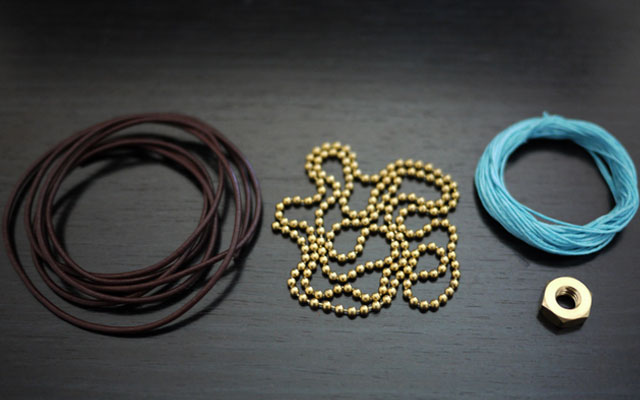
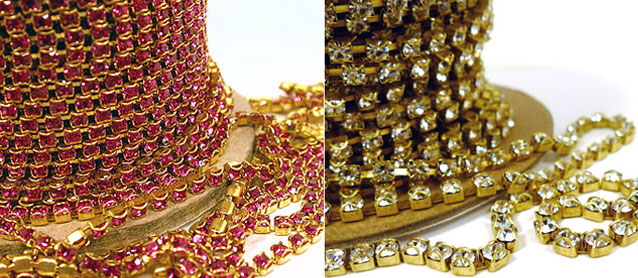
The rhinestone tape looks something like this. It can be found in any jewelry store.
Let's get to work:
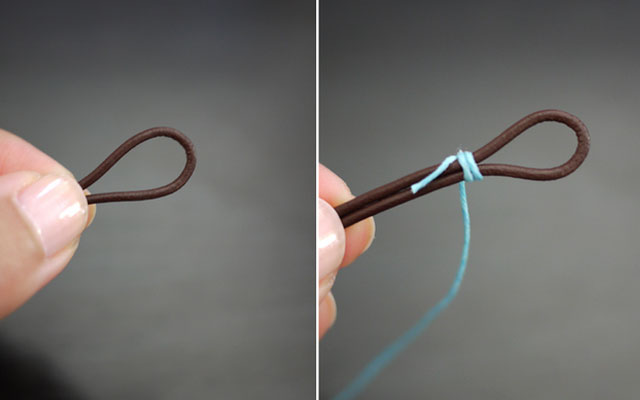
1) Fold the leather lace in half to make a loop. This loop will serve as a fastener and should fit the nut. Tie the loop with colored waxed thread and wrap its base 5-6 times so that the thread does not weaken or untie later.
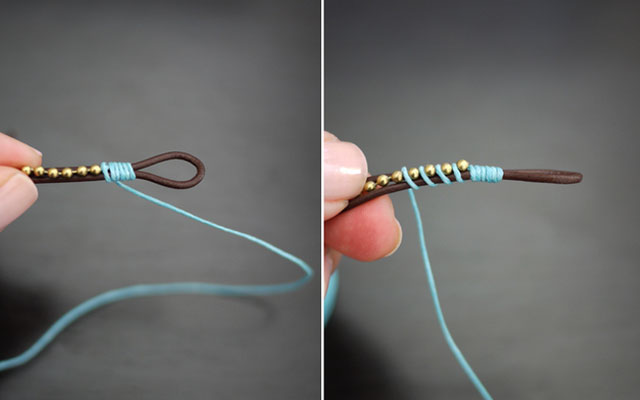
2) Place a ball chain in the center of the leather lace and start tying it with a colored thread, grabbing one each bead.
3) Keep tying the leather cord with the ball chain until you get the product of the desired length to wrap your wrist twice.
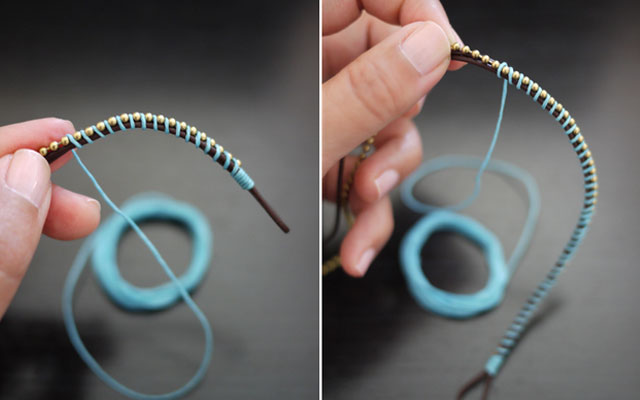
4) When the desired length is reached and the ball chain is over, tie the leather lace with colored thread several times and tie the end of the leather lace with a knot.
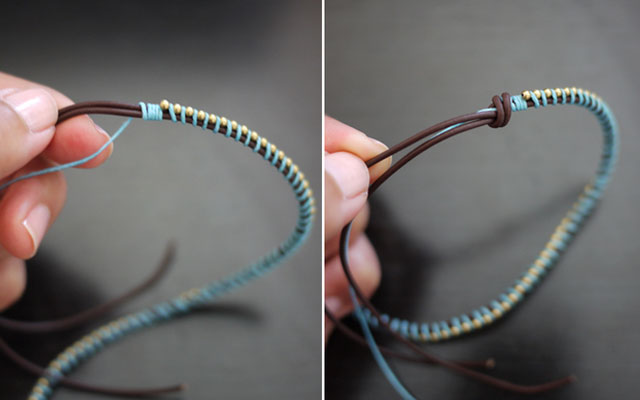
5) Place the nut on top and make another knot to secure it.
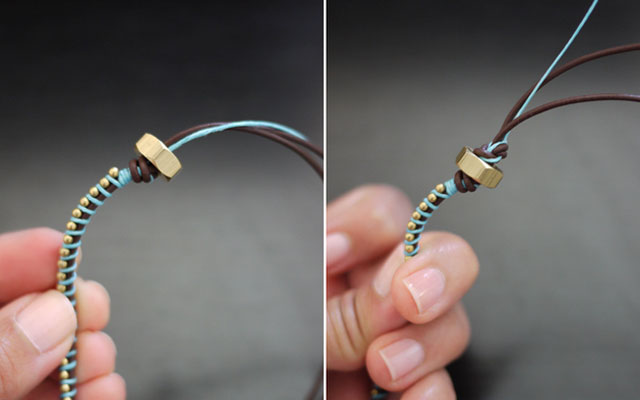
6) Cut off the unnecessary lace at the end with scissors, wrap it around the wrist and secure the “lock”. The bracelet is ready!
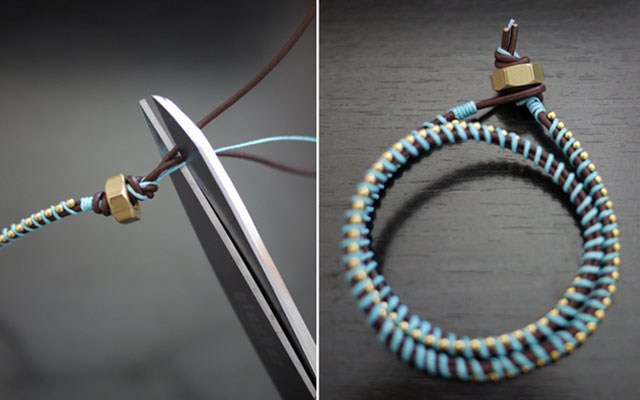
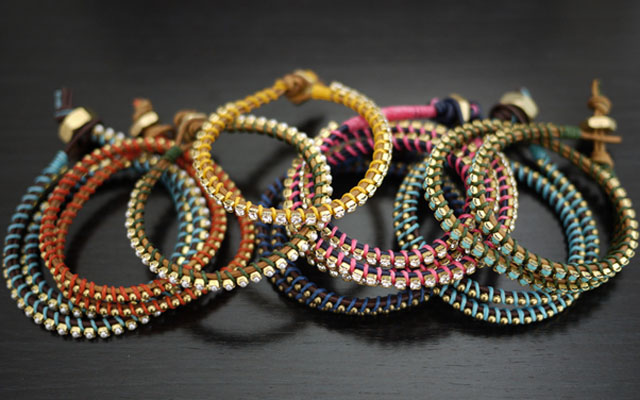
The length and quantity of materials are for a double bracelet, but you can make single or triple ones. The threads can be of any color of your choice.
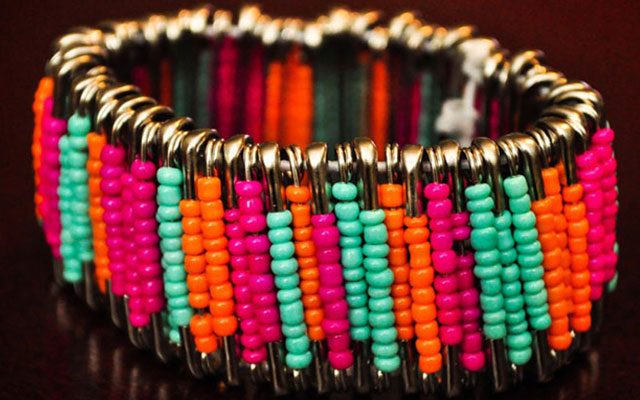
DIY pin bracelet
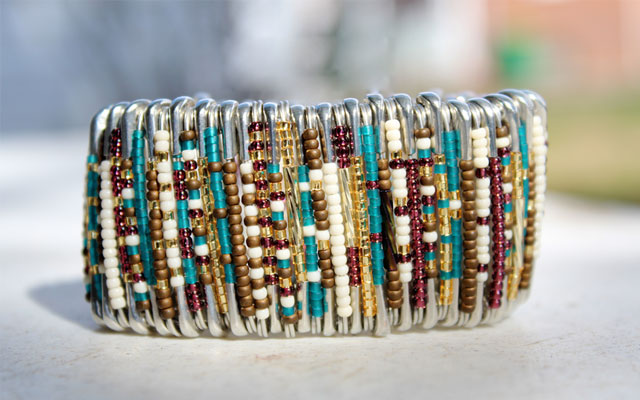
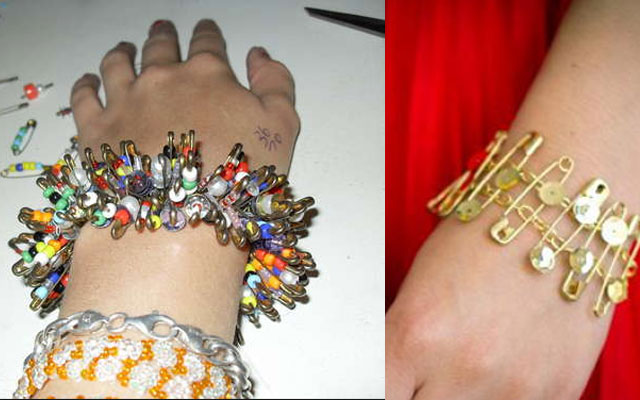
Pin and bead bracelets are a beautiful and very simple piece of jewelry that can be made in several ways, it all depends on your imagination and available materials.
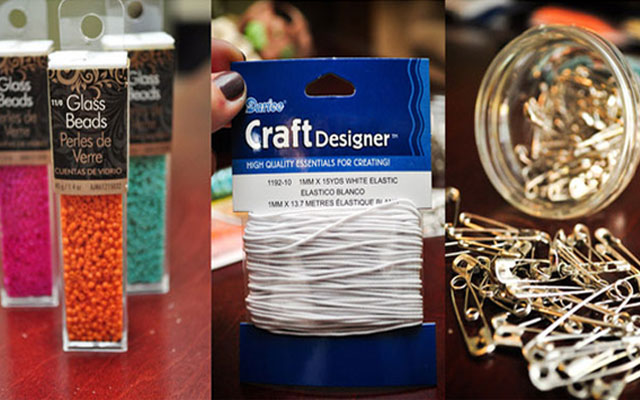
What you'll need:
— Pins
— Beads
— Elastic stretch cord
Let's get to work:
1) Make a lot of blanks from beads and pins. Combine colors as your imagination wishes: you can make plain rows, you can multi-colored ones. Beads of different sizes and textures also look good side by side.
2) Prepare 2 long pieces of elastic lace and string pins on them.
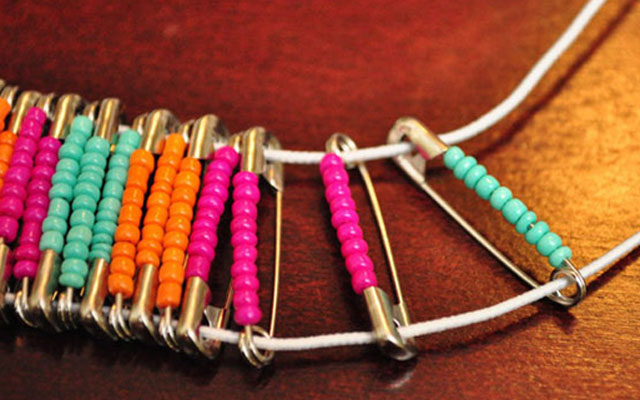
3) Fasten the ends of the laces together when the bracelet reaches the desired length. When working, place the bracelet to your wrist to check its length. Don't make it too tight and too tight so it doesn't pinch blood flow, and too weak to hang out.
DIY leather bracelet
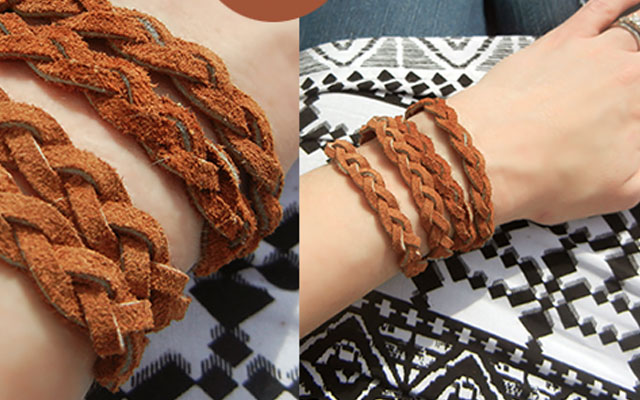
A braid-shaped leather rope bracelet wrapped around the arm several times looks pretty cute despite the rather rough material. It's very easy to make it yourself.
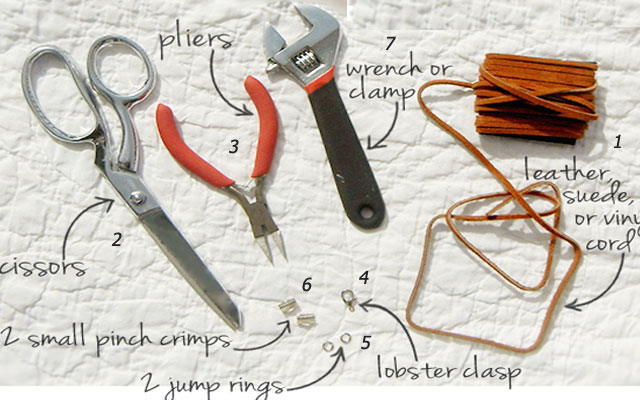
What you'll need:
— Leather or suede cord (1)
— Scissors (2)
— Pliers (3)
— Fastener (4)
— Two rings (5)
— Two jewelry clips (6)
— Wrench (7)
Let's get to work:
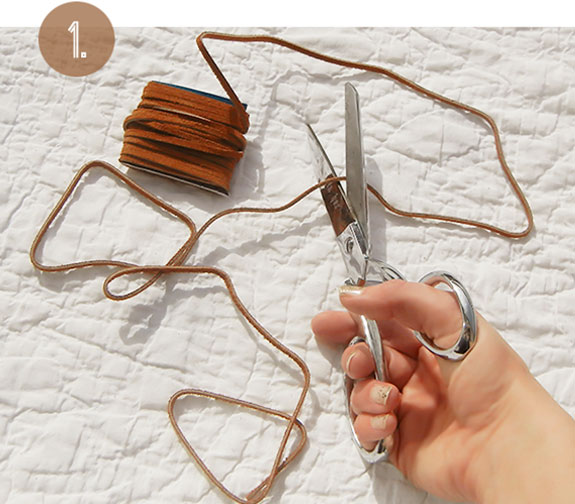
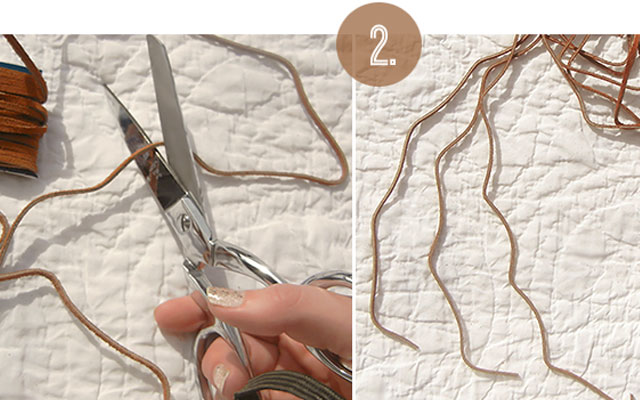
1) Cut a piece of leather cord so long that it can not be wrapped too tightly around the wrist 4 times.
2) Cut 2 more pieces of cord of the same length.
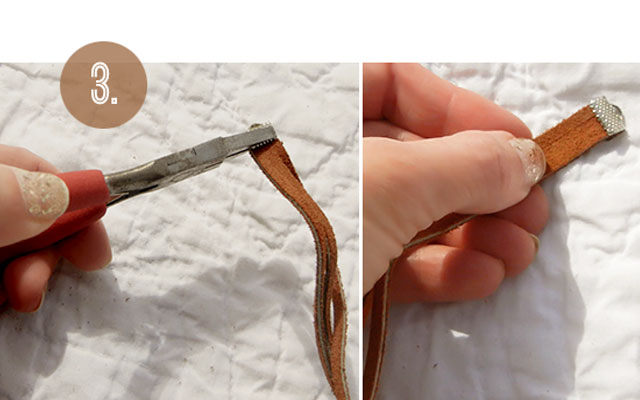
3) While holding the ends of all three laces, secure them with a clip.
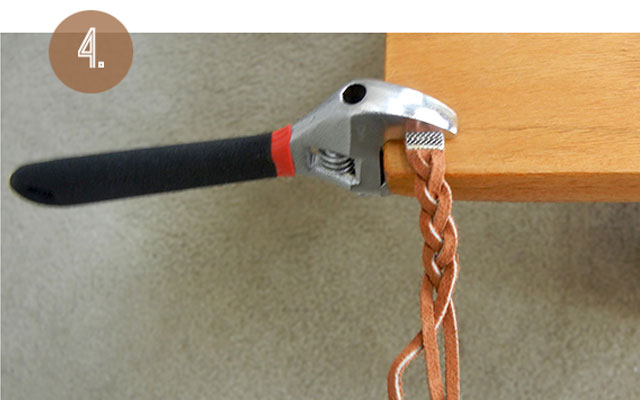
4) Use a wrench to secure the laces to the edge of the table to make the product easier to work with. Next, weave the cords into a pigtail.
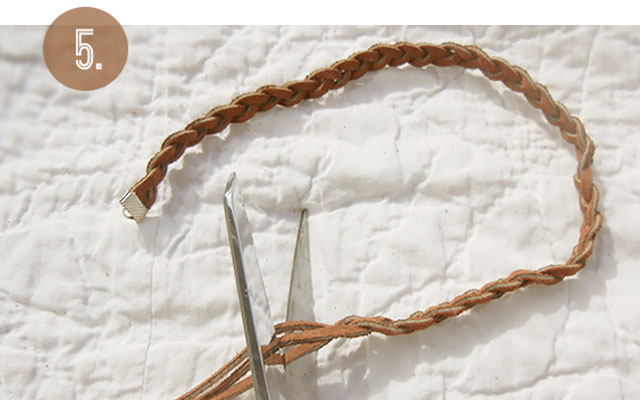
5) Cut off the excess edge and place the second clip on the other end of the cords, pressing it firmly.
6) Attach the clasp to the ends of the bracelet with rings. The decoration is ready.
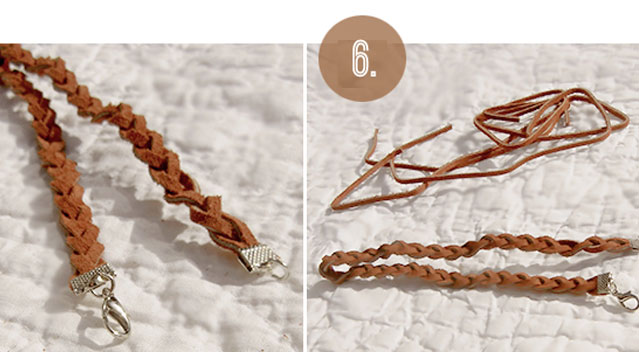
Very interesting bracelets are obtained when the macrame technique is combined with beads. These bracelets are called Shambhala bracelets. Learning how to make these bracelets is not difficult. The main thing is to understand the principle.
DIY Shamballa bracelet (video)
How to make a ring with your own hands
Do you think that it is impossible to make an original ring at home? You're wrong! It turns out that you can find a lot of unnecessary things in your home that you can use at work. Take, for example, old forks, spoons, knives that you haven't used for a long time, but you're sorry to throw them away.
We offer an idea how you can make an original ring from old iron appliances with elegant handles in a couple of minutes.
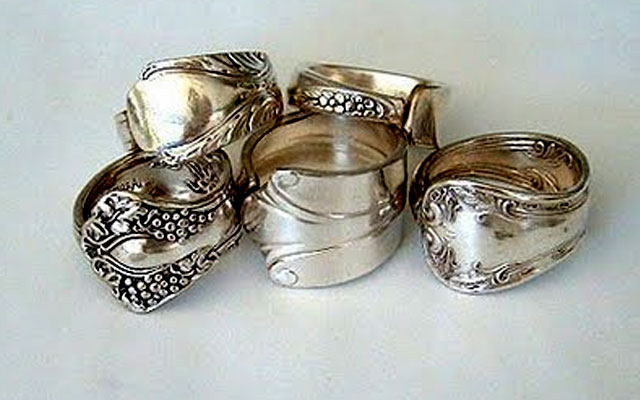
What you'll need:
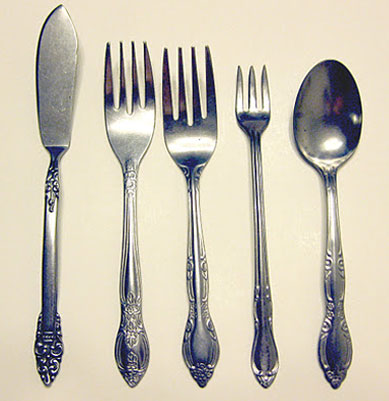
— Any old forks, knives, spoons with beautifully decorated handles. This is the basis of your product. It's better if it's silver devices
— Metal cutter or hacksaw
— Pliers
— Sandpaper
— A sheet of loose paper
— Pen
Let's get to work:
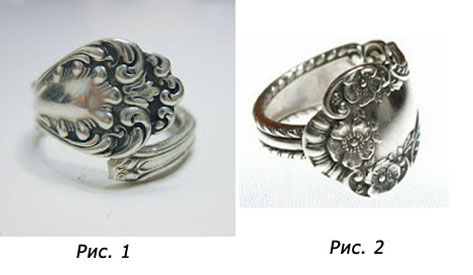
1) First, decide for yourself which rings you want to get. You can choose the one that seems to be wrapped around your finger — type 1 (Figure 1), or one of its ends will be hidden and not visible — type 2 (Figure 2). The length of the workpiece depends on this.
2) In the second step, you need to find the right cutlery, which will soon turn into a ring.
3) Take a strip of paper and wrap it around the finger on which you will be wearing the ring. Mark with a pen where the strip meets the other end. If you choose a type 2 ring, add about 6 millimeters more and add a bold mark. If you chose a type 1 ring, then you do not need to add extra millimeters.
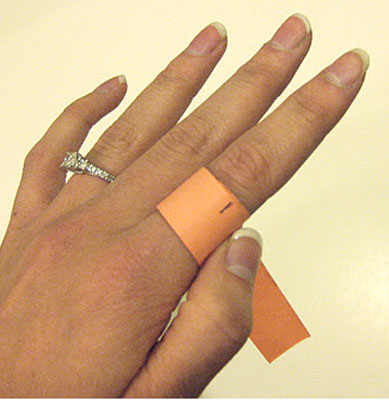
4) With the help of the resulting paper measure, you can make a blank for the ring by cutting off the fork handle in the right place using a metal cutter or hacksaw.
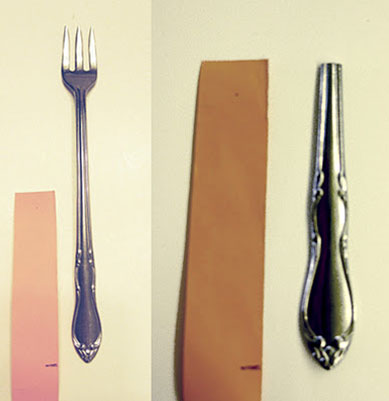
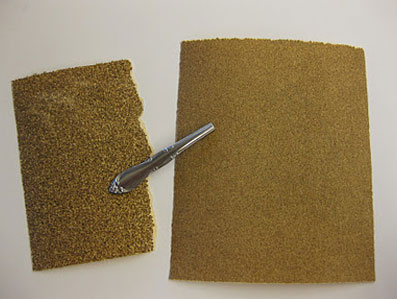
5) Treat the cut edge of the fork with sandpaper so that it is not sharp and you won't hurt yourself when the ring is ready.
6) At the last step, you need to carefully bend the resulting tip of the fork into a ring using pliers. If the fork is made of silver, it can be bent without problems.
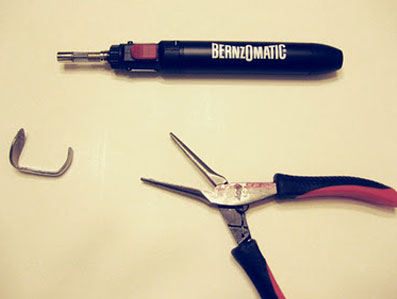
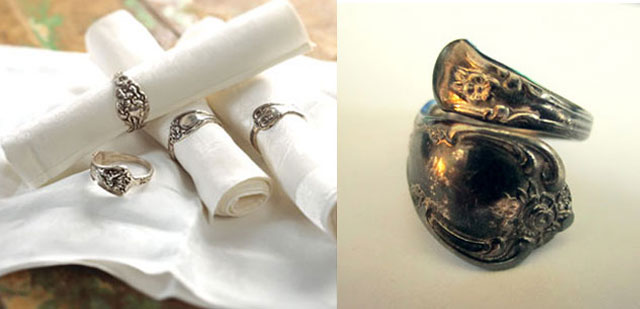
7) The result should be something like this:
DIY ring with a stone
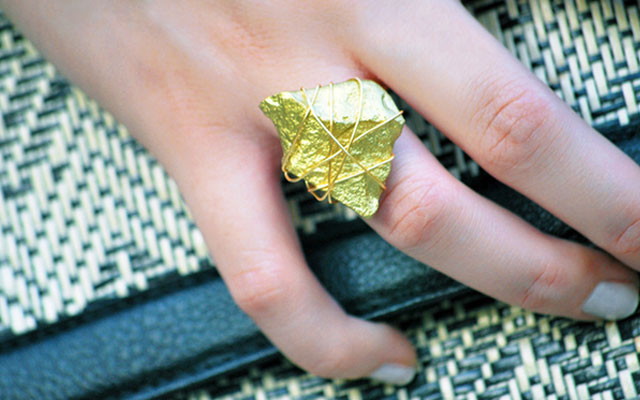
Another very stylish and original ring can be made from a simple pebble that you will find on the street, wire and paint. In an example, we'll show you how to easily and quickly make a ring with a “piece of gold”.
What you'll need:
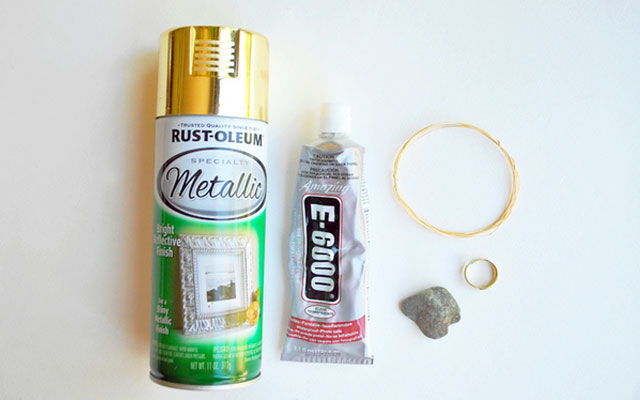
— A pebble of your favorite shape
— Golden wire 15-20 centimeters long
— Blank for a dimensionless ring
— Superglue for jewelry
— Gold paint can
Let's get to work:
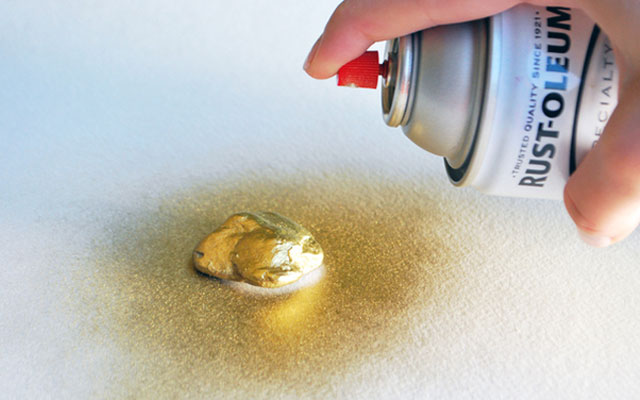
1) First you need to paint the stone from a can of paint. To do this, place a pebble on a sheet of paper and direct a stream of paint at it. After drying, turn the pebble over and process it on the other side.
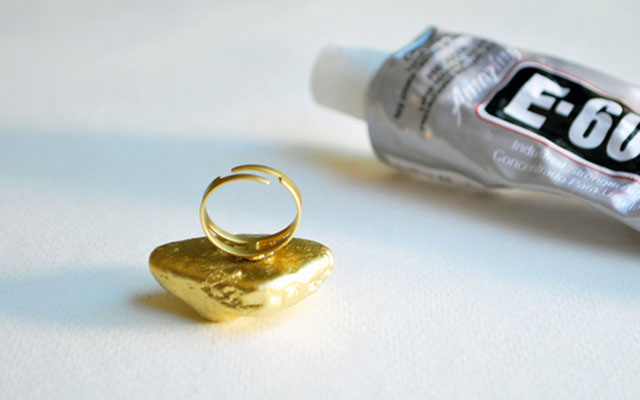
2) Using superglue, glue the ring to the stone. The ring should be made of solid wire or metal and it is better if it is heavy enough. It is also important that you can adjust the ring size.
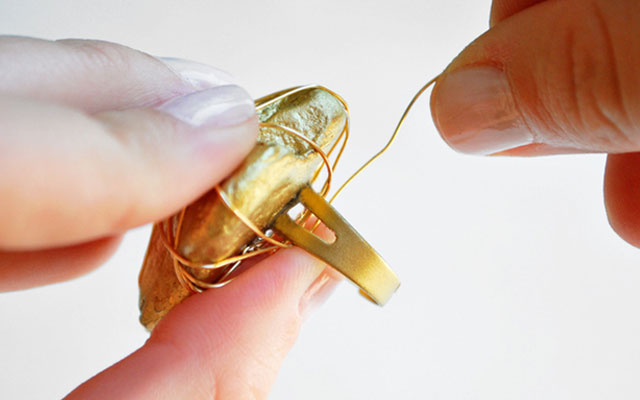
3) Wrap the stone and the ring several times with wire. This will help to attach the stone more tightly to the ring, and will also be part of the original design.
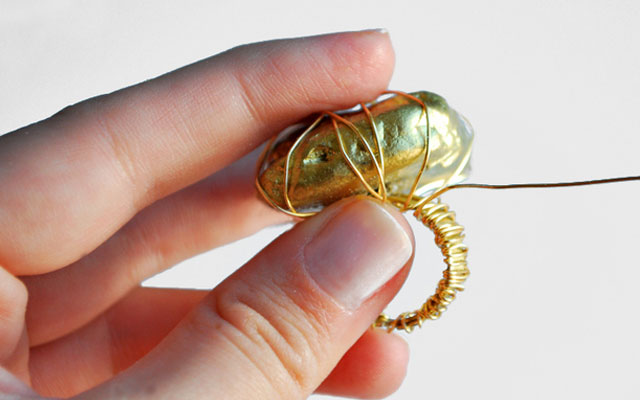
4) Wrap the remaining wire around the ring.
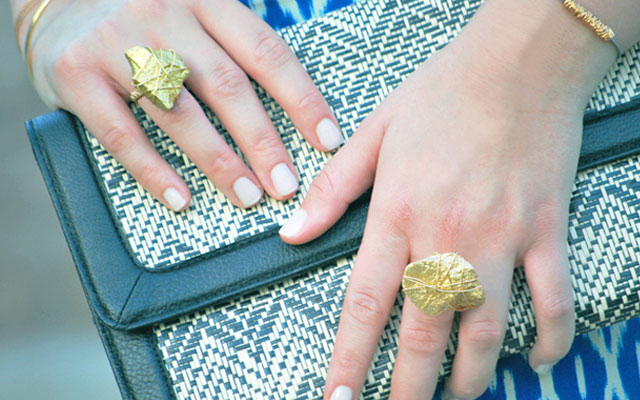
5) As a result, you will have a very stylish piece of jewelry. You can use any paint you like.
Homemade button ring
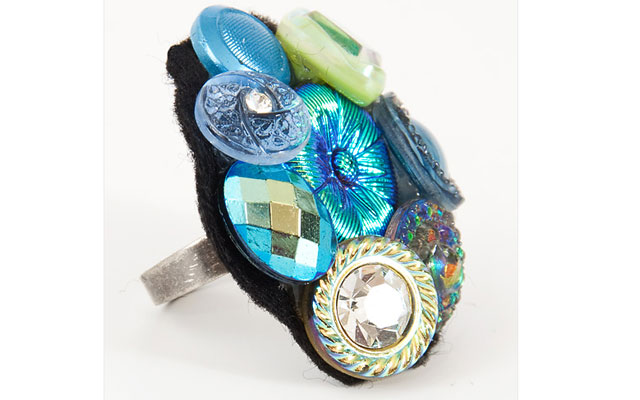
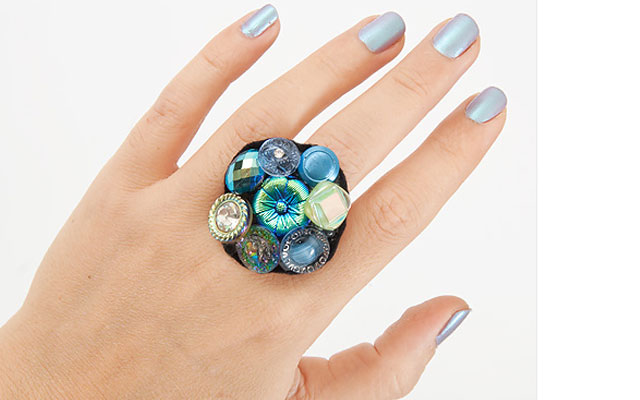
At the jewelry store, you can purchase a ring base on which you can attach any details: buttons, beads and other materials. The original ring can be made from old bright buttons and a piece of fabric.
What you'll need:
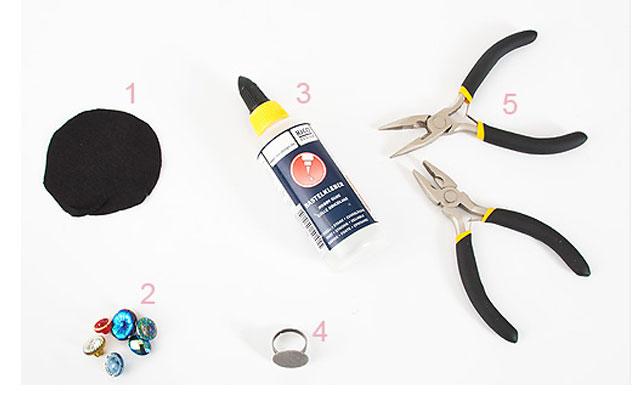
— A round piece of thin black felt about 5 centimeters in diameter (1)
— Decorative buttons in the desired colors (2)
— Super glue, but better electric gluing gun (3)
— Ring with base (4)
— Jewelry pliers (5)
Let's get to work:
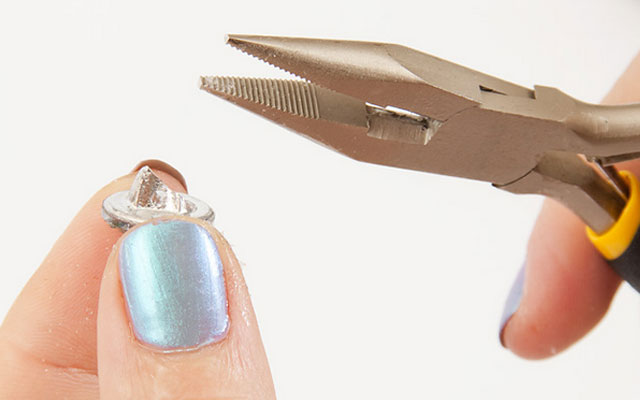
1) Remove the stitching loops from the buttons using pliers.
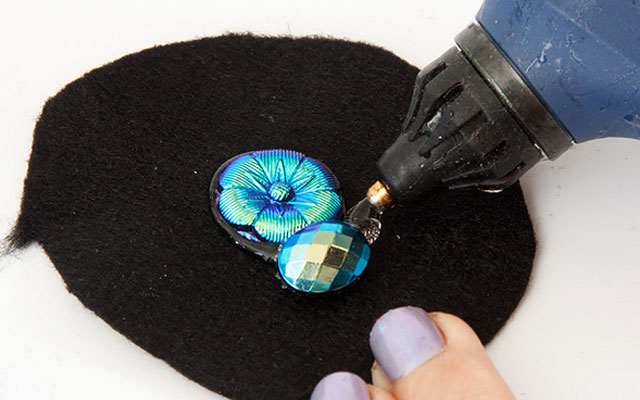
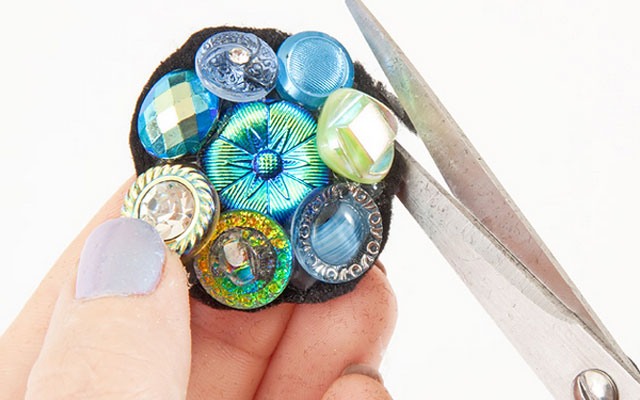
2) Glue the buttons to the piece of felt from the center in a circle close to each other to make a round shape. Let the glue dry properly.
3) Cut off excess felt from the sides. The edges can be left slightly uneven.
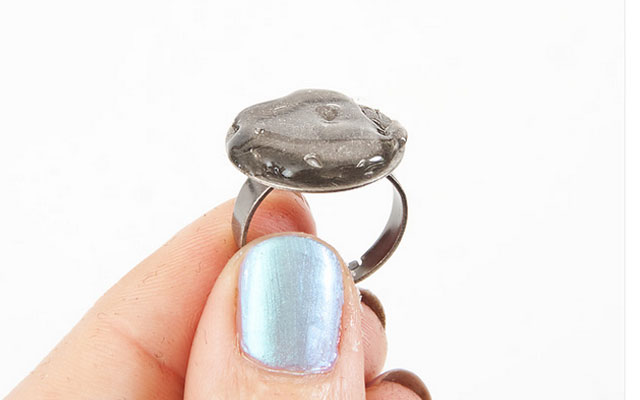
4) Grease the ring base well with glue.
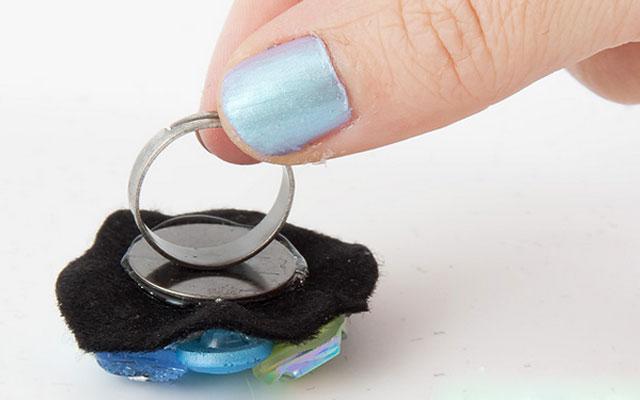
5) Glue the ring to the previously obtained part with buttons. Let it dry.
DIY necklaces
A necklace is a beautiful piece of jewelry that always catches the eye. If you like large bright necklaces, we suggest you try making it with decorated pistachio shells.
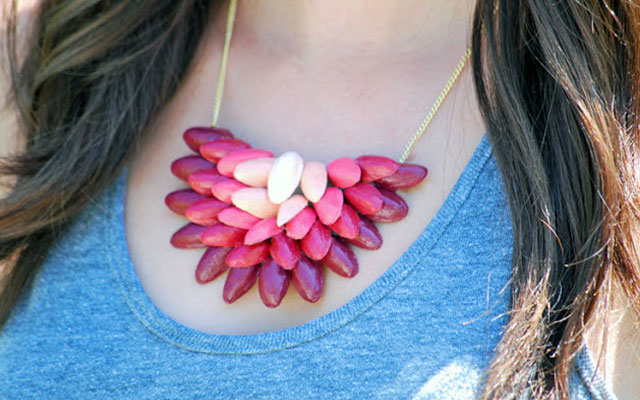
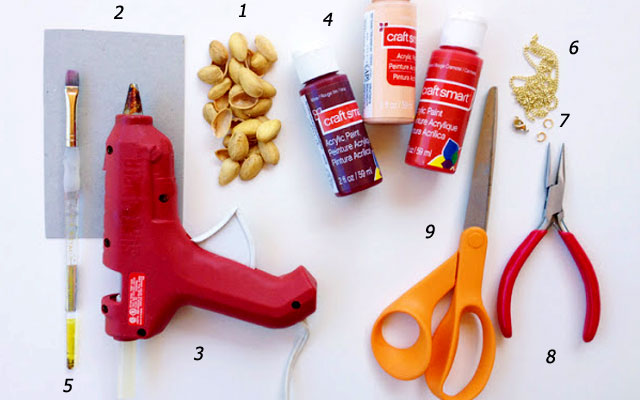
What you'll need:
— Single pistachio shells (1)
— A small piece of thick cardboard (2)
— Gluing gun or superglue (3)
— Nail polish or acrylic paint (4)
— Brush (5)
— Chain (6)
— 2 rings and clasp (7)
— Nippers (8)
— Scissors (9)
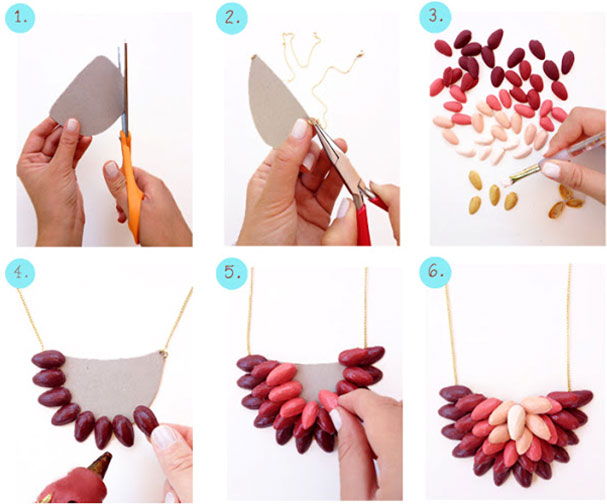
Let's get to work:
1) Cut a semicircular pattern out of cardboard, which will be the basis of your necklace. Its size is up to you.
2) Attach rings and a chain to the edges of the pattern using pliers.
3) Prepare pistachio shells, pre-decorating them in the right colors.
4) Using glue, glue the shells to the base, starting from the edge. Tip: Before gluing, attach the shells to the cardboard and consider how you will lay them out.
DIY bead necklace
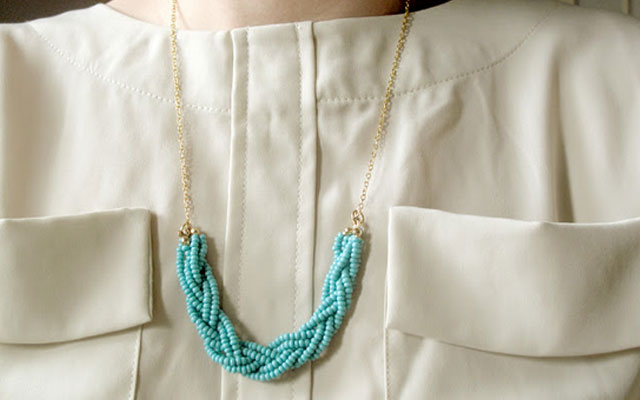
To make this jewelry, you need to choose beads of the desired color. The size of the necklace depends largely on the size of the individual beads, so if you want a thicker piece of jewelry, choose larger beads. It's hard to say how many beads you might need, but it's better to take them with a margin.
What you'll need:
— Beads of the same or different colors (1)
— Chain (2)
— Scissors (3)
— Nippers (4)
— Adjustable rings — 2 pieces (5)
— Fastener (6)
— Calottes — special clips for attaching beads to a chain and masking knots (7)
— Fishing line or thick thread (8)
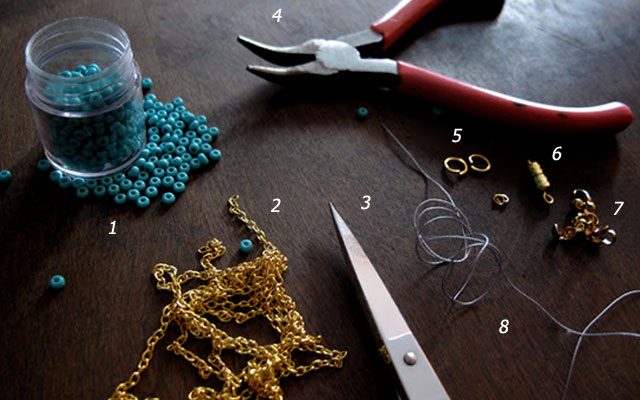
Let's get to work:
1) Cut 6 pieces of thread or fishing line about 25 centimeters long, strung beads about 15 centimeters long on each of them.
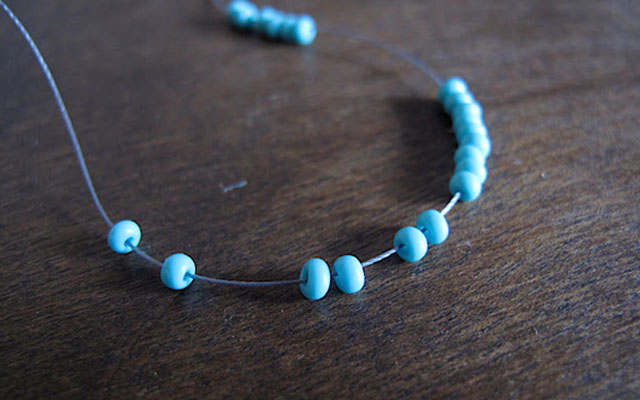
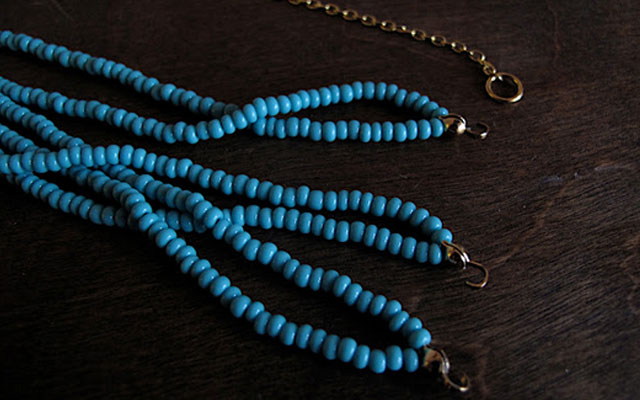
2) You should have 6 threads of beads, of which you need to make 3 pairs by connecting the ends of the two threads and securing them around the edges with calottes. Make sure that the knot is tied as close to the beads as possible so they won't hang out. Cut off the excess thread.
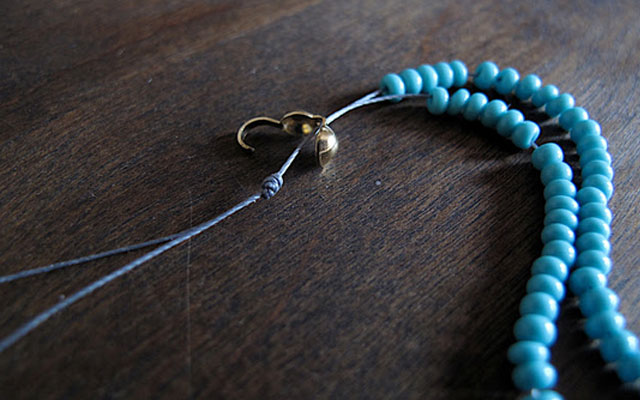
3) Connect 3 pairs of threads to the chain using a ring and then do the same with the other ends.
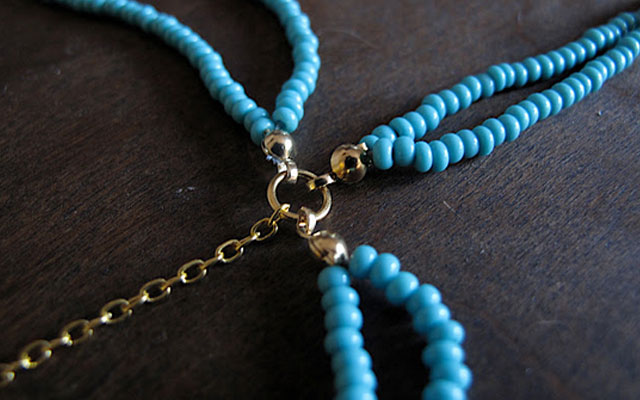
Tip: Before connecting the other ends of the beads to the chain, braid them into a pigtail to create a weave effect.
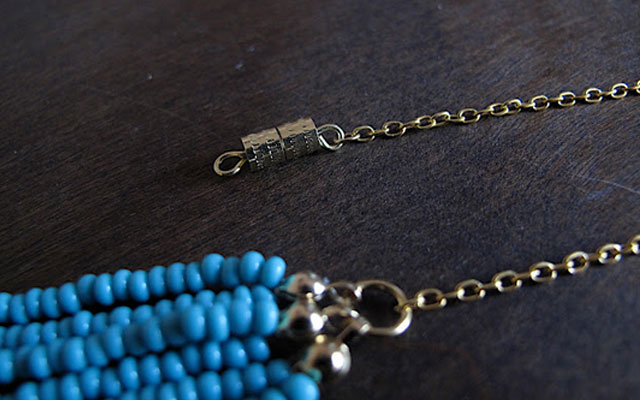
4) The chain should first be divided into 2 parts depending on the desired length and connect both ends to the fastener.
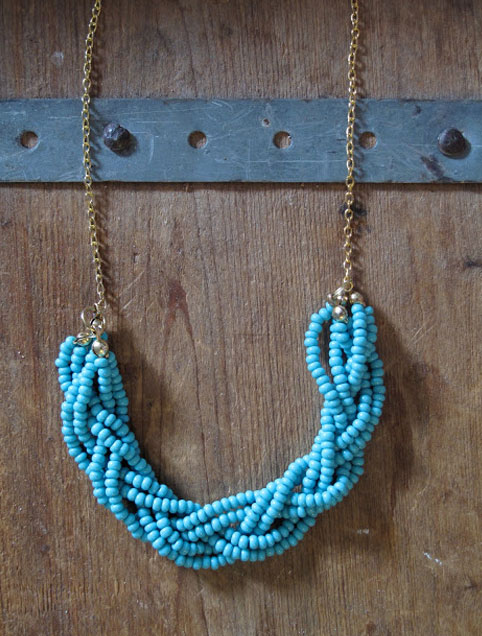
5) As a result, you should get this necklace:
DIY neck decoration
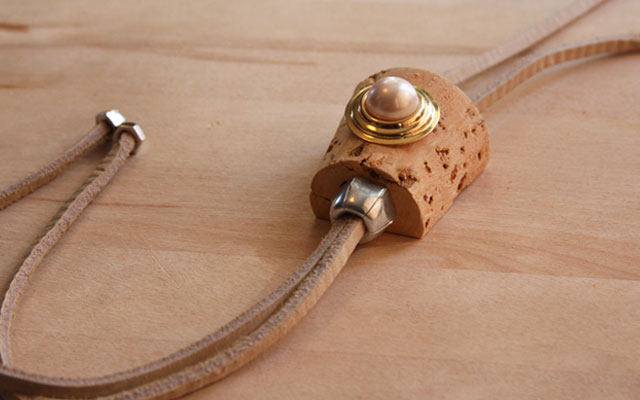
An original necklace can be made from a simple champagne cork with a little imagination.
What you'll need:
— Cutting board
— Sharp knife
— Drill
— Champagne cork
— Superglue
— Leather or suede cord about 1 meter long
— A beautiful button or earring with a pebble for the central detail
— Nuts: 1 ordinary hexagonal and 2 cap nuts
— Pin
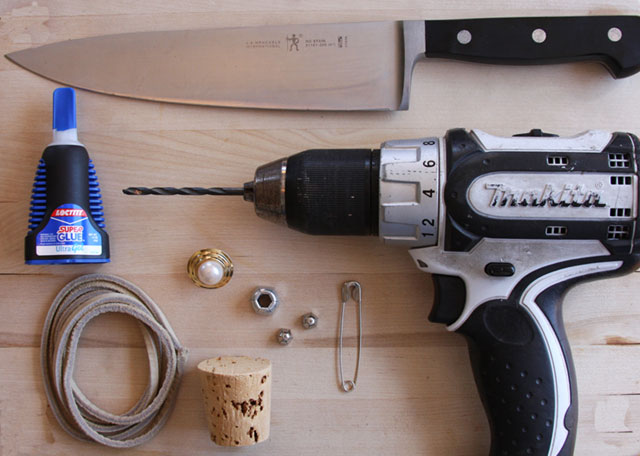
Let's get to work:
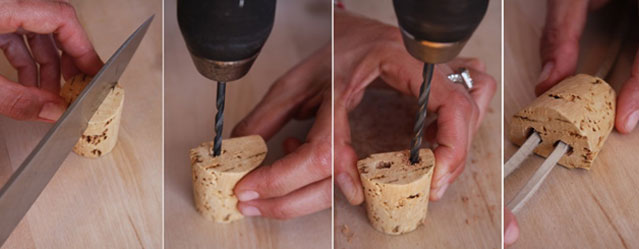
1) Cut about one third of the cork lengthwise with a knife. In the larger half, poke two holes with a drill, and then, using a pin, pull the two ends of the lace into both holes.
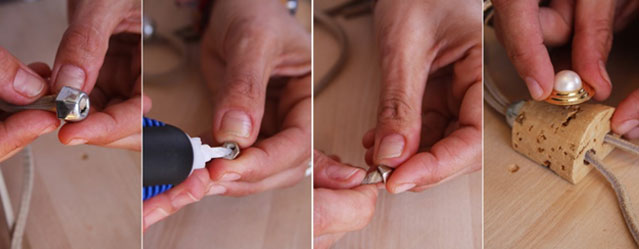
2) Slide the ends of the shoelaces into the nut and secure it to the bottom of the cork. Glue cap nuts to the ends of the shoelaces. Attach an earring or button to the center of the cork on the convex side.
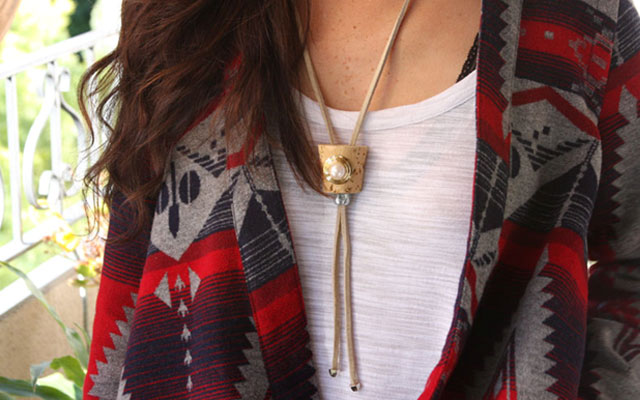
As a result, you will get an original piece of jewelry, the length of which can be adjusted.
DIY hairpins
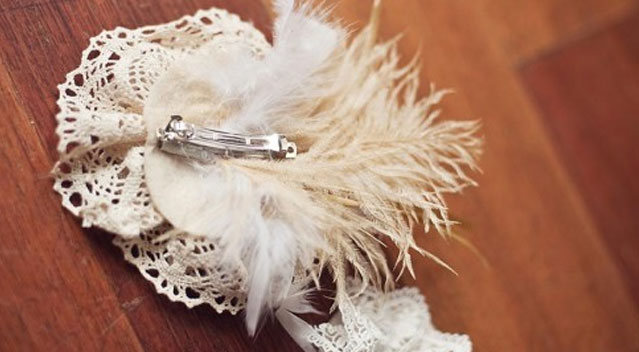
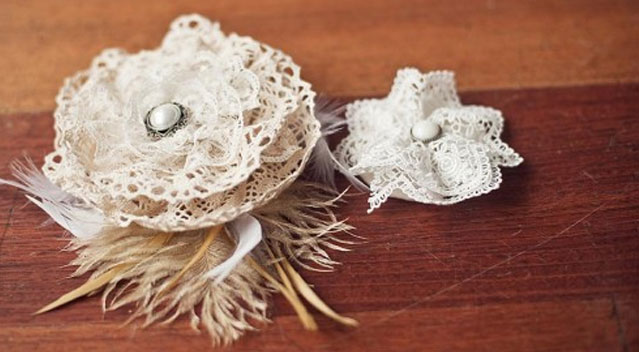
A hair clip can be made using a piece of lace, beads and feathers. This original vintage-style hairpin is suitable not only for bridal outfits, but also for other festive outfits.
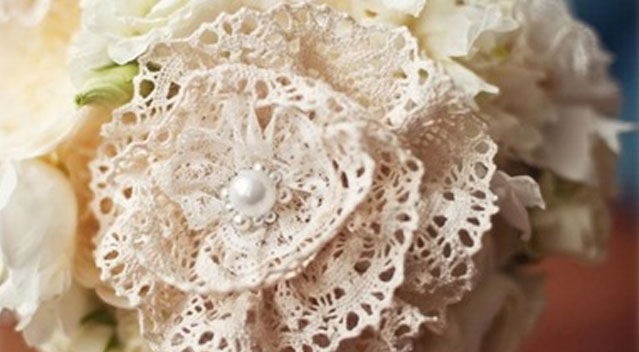
What you'll need:
— Lace tape 2-2.5 centimeters thick and 45 centimeters long
— A piece of white felt
— Scissors
— Gluing gun
— Needle threads
— Bead or decorative button
— Barrette base
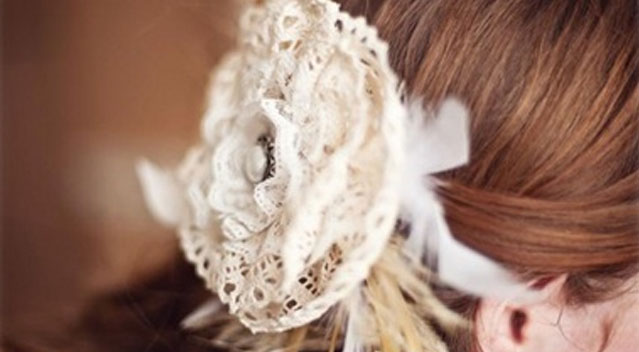
Let's get to work:
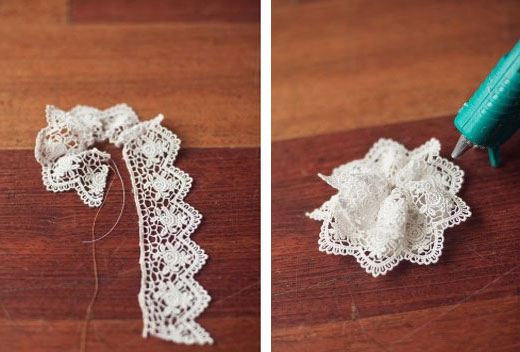
1) Sew the white lace ribbon with a thread so that, by tightening the thread, you can roll the flower. You can sew by hand or use a sewing machine.
2) Cut a circle about 5 centimeters in diameter out of the felt. Glue the lace to the felt with a gluing gun.
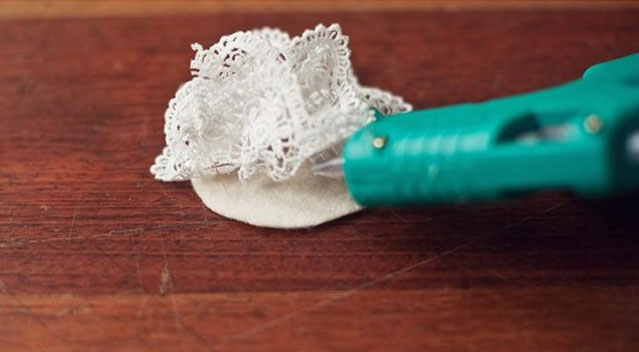
3) On the back side, glue a pair of feathers and a barrette to the felt. Let the glue dry.
4) Glue or sew a bead or decorative button in the central part.
DIY feather hair clip
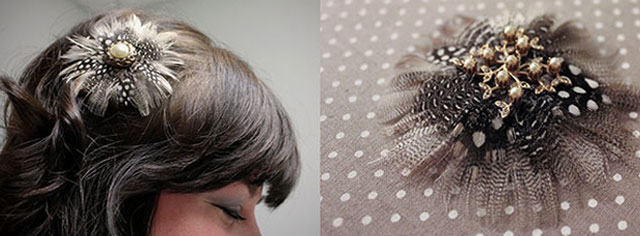
Hair clips with feathers look very impressive. If these are bright and colorful feathers, the jewelry is suitable for festive outfits, if the feathers are natural colors, these hairpins can be worn with everyday outfits.
What you'll need:
— Normal hair clip base
— A piece of felt material
— A glass or any round measure to cut an even circle
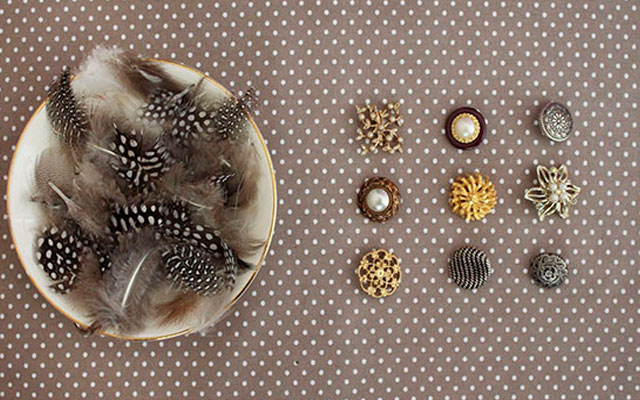
— Feathers
— Beads or decorative buttons
— Scissors
— Gluing gun or superglue
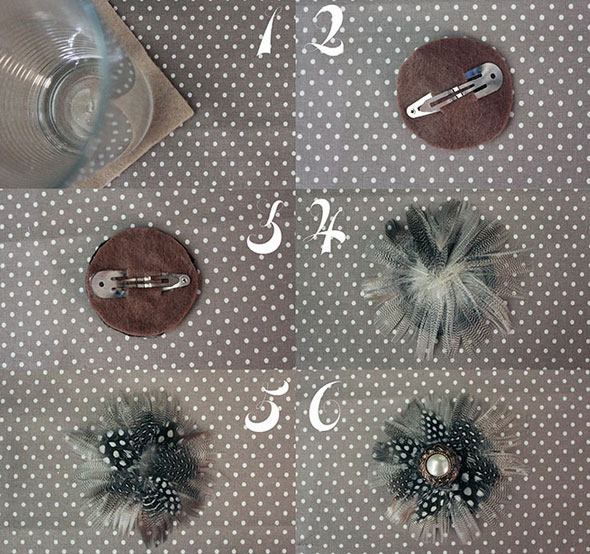
Let's get to work:
1) Using a glass or other device, cut two circles with a diameter of about 5 centimeters or more, depending on the size of the base clip.
2) After making the cuts, insert the base into one felt circle.
3) Glue the two fabric circles together with glue to strengthen the base clip.
4) On the reverse side, glue the first lower layer of feathers, then the upper one.
5) Glue a bead or decorative button to the center.
6) The hairpin is ready.
DIY earrings
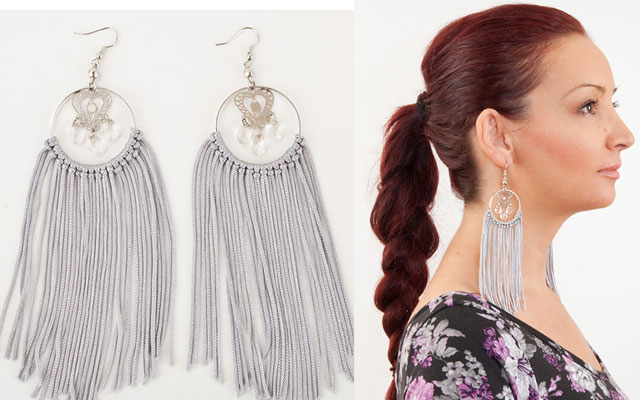
An interesting option for updating ring earrings can be made by yourself by adding hanging shoelaces to them. If you are tired of regular hoop earrings, updating them is easy. Moreover, the shoelaces are just as easy to remove as they are attached, so you can return your earrings to their original appearance at any time.

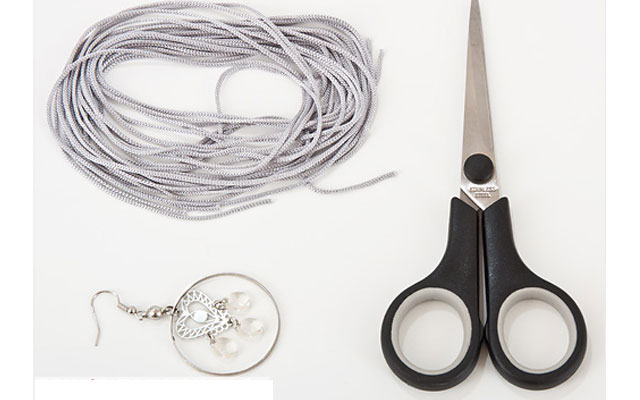
What you'll need:
— Any ring earrings, for example, with a detail inside the ring
— Thin laces of any color
— Scissors
Let's get to work:
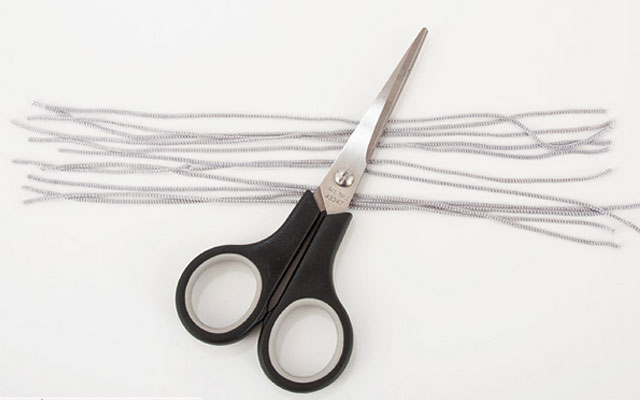
1) Prepare the desired number of laces of the right length depending on the size of the ring. Please note that the lace will be folded in half.
2) Fold the lace in half and pass the ends through the loop, grabbing the ring, as shown in the photo. Do the same with all the laces.
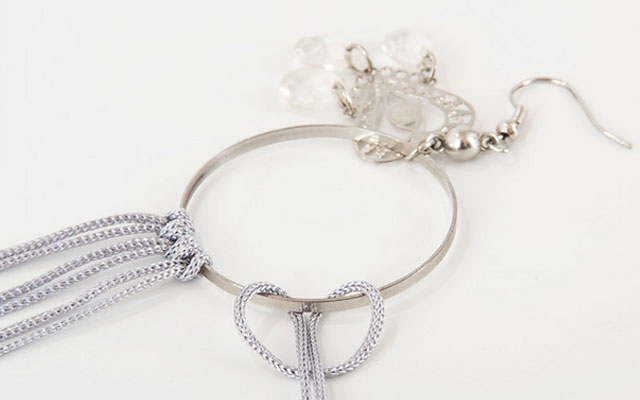
3) At the end, you will get this product with a “fringe”. You can also trim the ends of the shoelaces with scissors.
DIY feather earrings
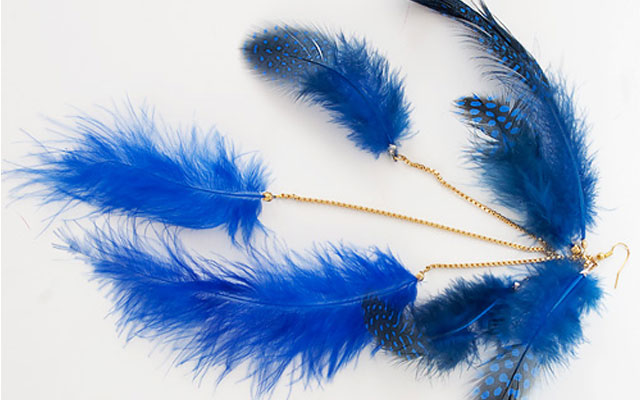
Jewelry that use bird feathers as details look very original. You can buy feathers at a jewelry store, or you can find them somewhere else. The stores have feathers not only in natural colors, but also artificially colored ones.

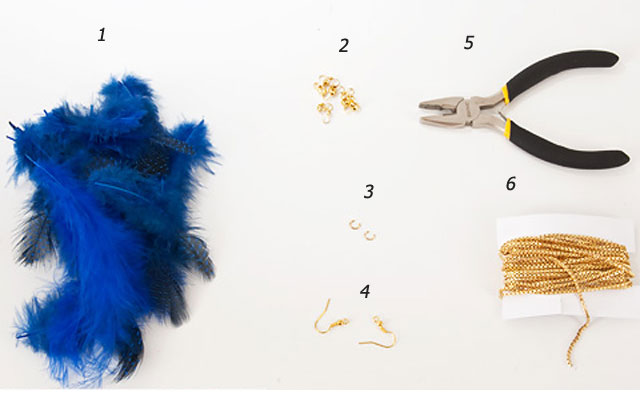
What you'll need:
— Feathers (in this case, guinea fowl and turkey feathers were used) (1)
— Calottes (2)
— 2 rings (3)
— 2 ear hooks (4)
— Pliers (5)
— Chain (6)
Let's get to work:
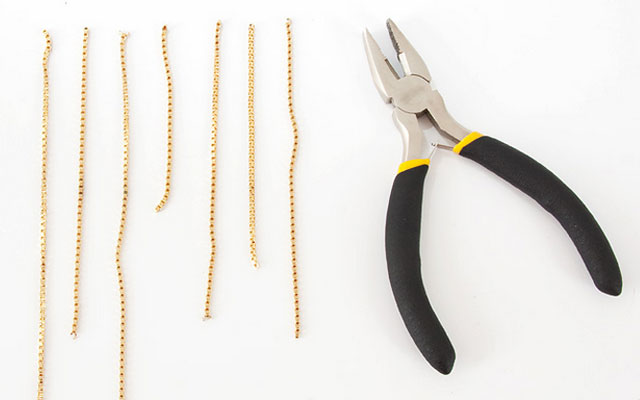
1) Cut pieces of different lengths from the chain. Their number depends on how many feathers you want to hang.
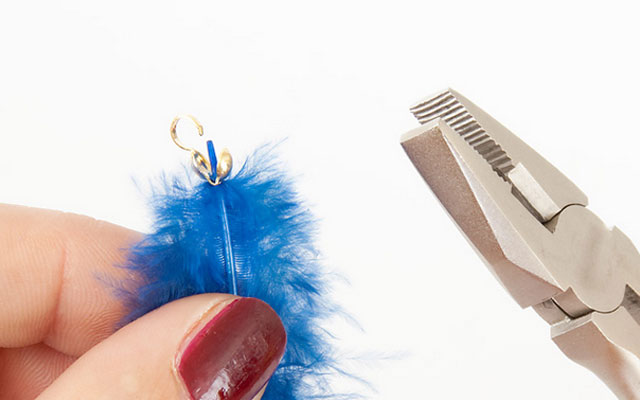
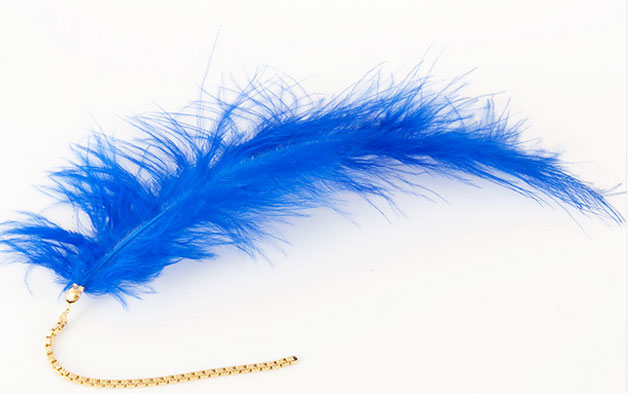
2) Using pliers, attach the calottes to the feathers.
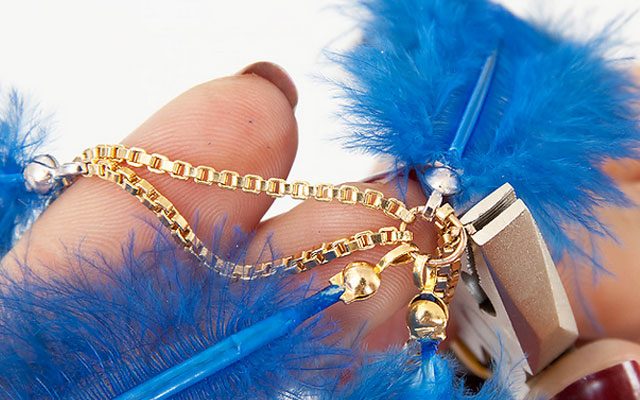
3) Connect the pen to the chain. Do this with all the feathers and chains.
4) Attach all chains to one ring.
5) And attach the hook to the ring.
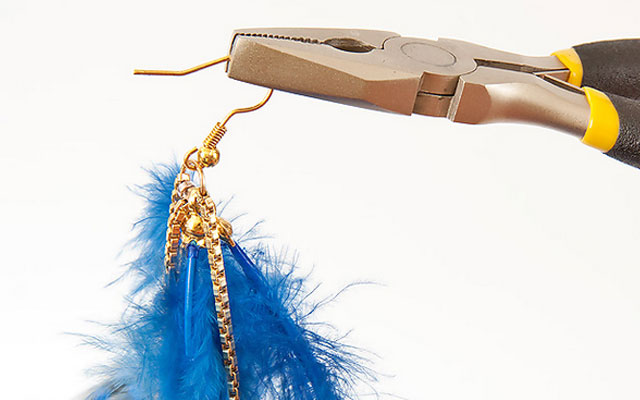
6) As a result, you get this earring. Make a second earring in the same way.