 Useful tips
Such a gift will undoubtedly be pleasant to the person you give it to, especially if this person is a mother, grandmother or your friends.
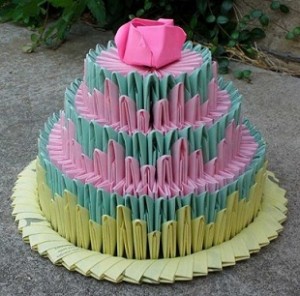
The cake, made of triangular modules, looks very colorful, but you will need a lot of patience to make it, as you will have to prepare a lot of modules.
It is also worth mentioning that for such a cake you need to make modules of different sizes. You can read more information about how and what size the module can be made by clicking on this link.
How to make a cake out of modules
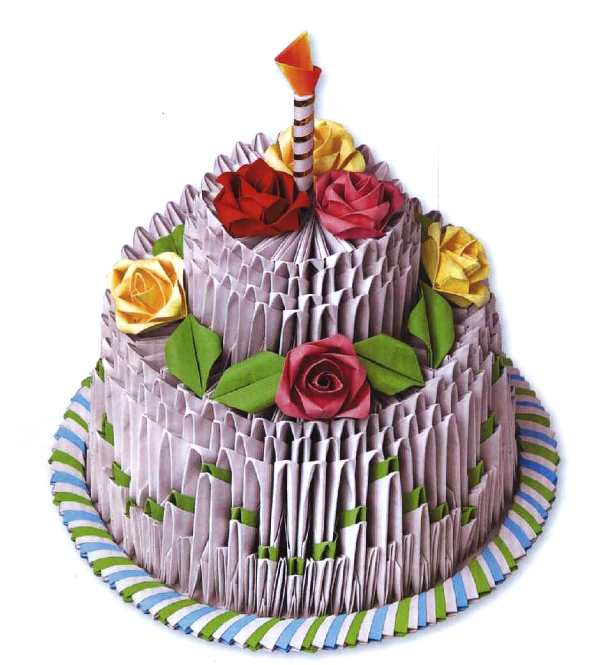
First, you need to prepare modules of different sizes, which means you need to cut rectangles of different sizes.
Cake from modules scheme
Here are detailed instructions on the size, number and color of the modules you will use when making your origami cake:

Type 1. A module of 1/4 A4 sheets – 175 white and 7 green.
Type 2. A module of 1/8 A4 sheets – 166 white and 14 green.
Type 3. Module of 1/16 A4 sheets – 14 white and 14 green.
Type 4. Module of 1/32 A4 sheet (rectangle size 60×38 mm) – 7 white and 7 green.
To make a plate from modules, you will need about 130 type 4 triangles. You can choose the color you want.
Triangular module cake
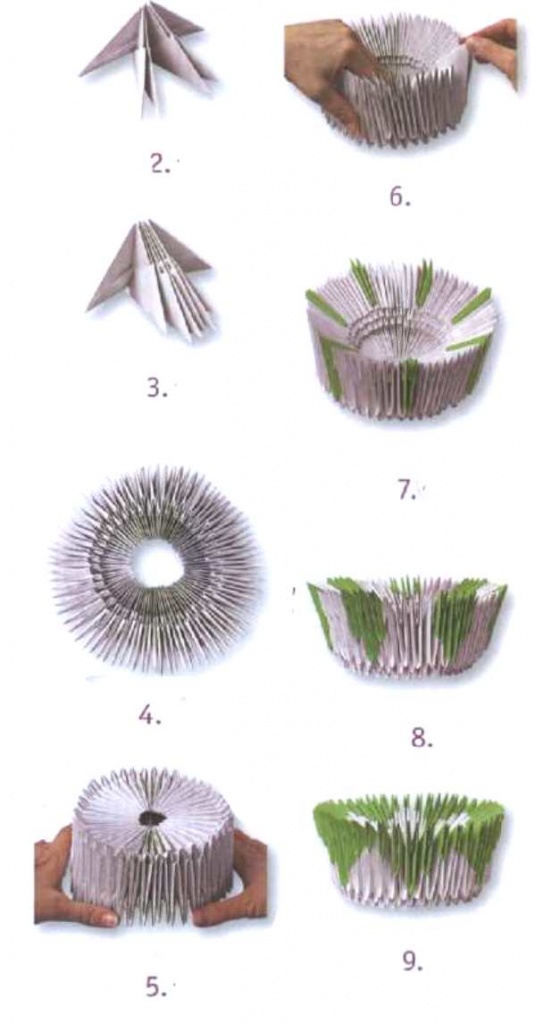
1. Prepare 42 Modules for the first row. Prepare the same amount for the second and third rows.
– You need to connect the modules in such a way that they are on the short side in the first row and on the long side in the second row.
– When you connect 4 modules in the first row and 3 in the second row, you can start cooking the third row. Attach the triangles to the long side in a checkerboard pattern.
2. Collect three rows at the same time and lock them into a ring.
3. Now you need to turn the entire structure over to the other side and gently press its edges with your fingers to make it turn. You should get a design in which the edges go to the center and the middle up (see picture).
4. Turn the structure over again and start building the fourth row of type 1 modules (1/4 A4 sheet).
– seven green modules in the fourth row must be attached so that there are 5 white modules between them.
5. Prepare 14 type 2 modules and attach them to each side of the green type 1 modules.
6. Prepare 14 Type 3 modules and attach them to the sides of the Type 2 modules, and insert seven Type 4 modules in the middle.
7. Insert the same number and the same type of white modules directly onto the green triangles.
8. To make the upper tier, simply repeat the instructions for creating the lower tier, but with type 2 modules. It is also worth mentioning that the upper tier consists of five rows.
– Each of the three rows should contain 22 modules.
– It is also desirable to collect three rows at a time.
– Close the ring, unscrew the structure and add two more rows.
9. We make a cake stand. You need to prepare 130 modules of type 3 or 4 and, inserting one into the other, close the circle to make a plate.
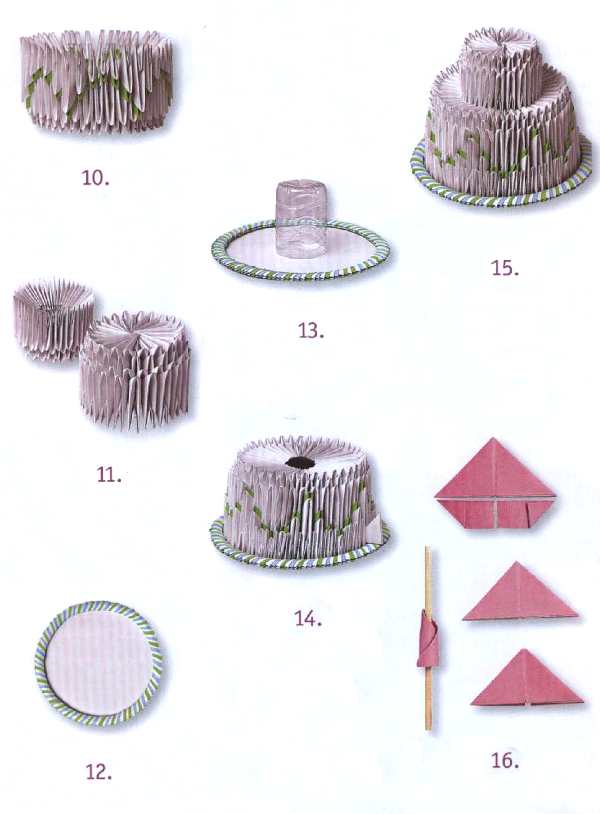
To add the bottom to your plate, you need to cut a circle of thick paper, about 20 cm in diameter. Then just glue the circle to the modules.
Tip: To prevent the lower tier of the cake from spreading, you should make a support in the form of, for example, a small plastic bottle or half a larger bottle.
10. First, place the lower tier on a support. If you notice large distances between the modules, try closing them by inserting type 2 triangles into the gaps with pockets facing out.
11. Now put the lower tier on a support. Also, if large distances are found between modules, cover them with type 2 triangles, inserting the modules with pockets outward.
12. The upper tier should now be placed exactly in the center of the lower one. Find a groove in the lower tier for each corner of the upper tier. Try using a toothpick for this.
After that you have picked up all the grooves, the upper tier will enter the lower tier. You'll have to push it in a little bit more.
How to make an origami cake from modules (video)
Now it's time to decorate the cake. For this example, roses from the modules are used as decorations.
Module cake. Master class. Cake roses.
To make roses you will need:
Type 4 modules:
pink — 27;
yellow — 27;
red — 9;
green — 16.
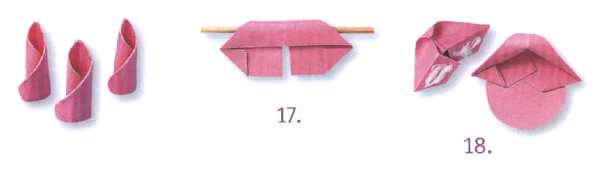
To make one rose, prepare 9 type 4 modules.
– Deploy the 3 modules and cut off the valves.
– screw each module tightly onto a thin stick, such as a skewer, toothpick, or thin pen rod.
* When you wind up the module, make sure that its long side remains level.
– Make sure that the twisted workpieces have a flat end so they can stand on the table
– deploy 6 more modules and screw their corners onto a stick
– now you need to cut a circle with a diameter of 25 mm in the same color as the roses. Lubricate the valves with PVA glue
– Put the halves of the triangle together and stick it to the circle. Repeat the same with two more modules
– glue the next round of rose petals in the same style. You'll have to mix the halves harder
– insert two rolled pieces into one another. Lubricate their ends with glue and glue them to the center of the flower
– also grease the third workpiece with glue and glue it around the first two.
Origami cake made of triangular modules. Rose petals.
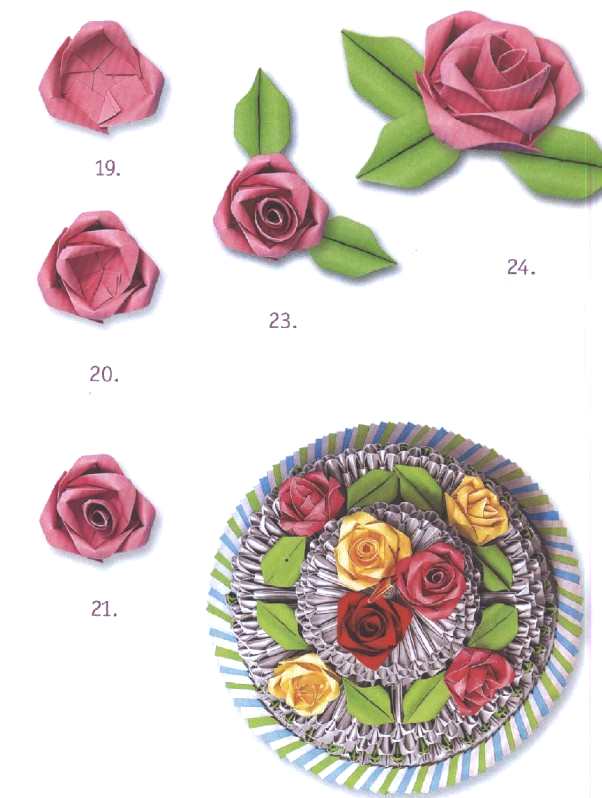
To make one leaf, you need to deploy two modules, lubricate the valves with glue and insert them into the pocket of the other module. The valves of the second module must also be lubricated with glue, but on the reverse side, and glued.
The place where you glue both parts together will be the central vein of the leaf.
You can screw the corners of the leaf onto a stick.
You can attach leaves and roses anywhere on the cake.
You can add a candle – to do this, roll a piece of paper into a tube. Then glue the tube in a spiral with a thin strip of foil. Make a candle light by gluing two modules together.
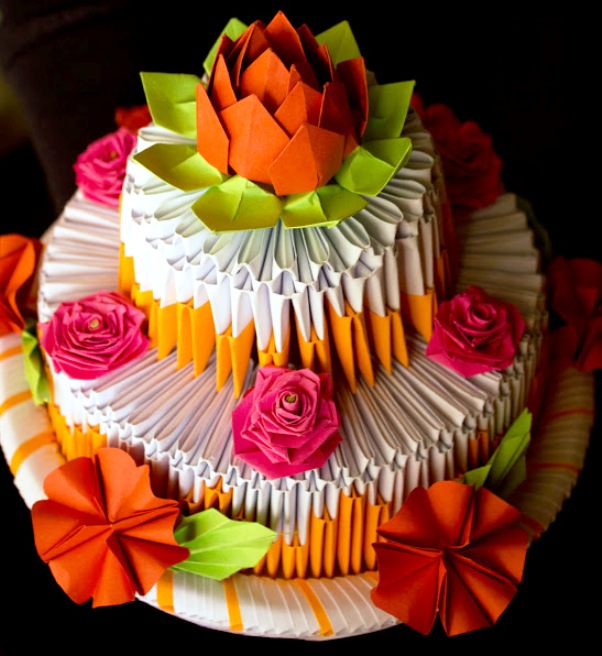
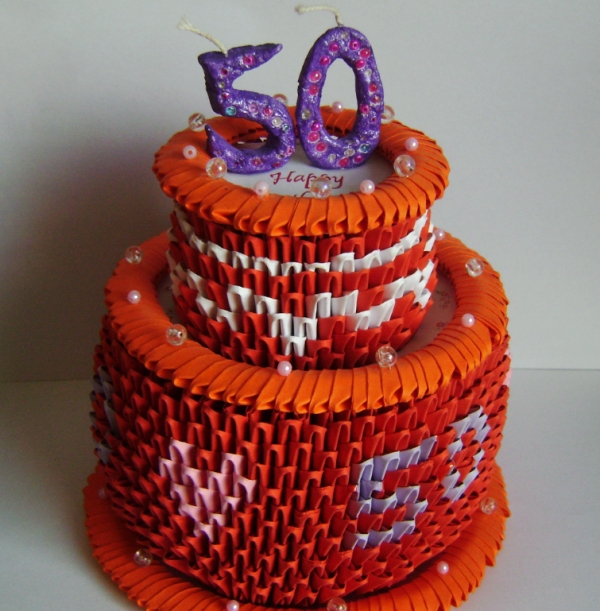
Here are some more examples of paper module cakes made using the same technology.